Changing a Fax/telephone Number Using Speed Dial Utility2
Follow the procedure below to change fax/telephone numbers.
 Note
Note
- Before you change fax/telephone numbers using Speed Dial Utility2, make sure that no fax operations are in progress.
-
Select a printer from Printer Name: list box, and then click Display Printer Settings.
-
Click TEL Number Registration from Setting Item List:.
The list of registered fax/telephone numbers is displayed.
-
Select a code to change from list, and then click Edit....
-
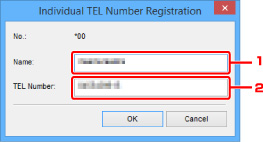
If an individual fax/telephone number is selected:

-
Enter a new name.
-
Enter a new fax/telephone number.
-
-
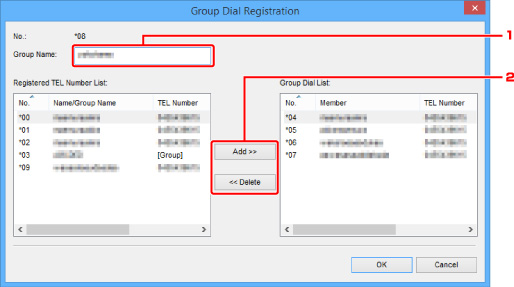
If a group dial is selected:

-
Enter a new group name.
-
Add or delete a member to/from group dial.
- To add a member:
- Select a code to add to group dial, and then click Add >>.
- To delete a member:
- Select a code to delete from group dial, and then click << Delete.
-
-
-
Click OK.
To continue changing fax/telephone numbers or group dials, repeat steps 4 and 5.
-
To save the edited information on the computer.
-
Click Save to PC....
-
Enter file name on displayed screen, and then click Save.
-
-
To register the edited information to the printer:
-
Click Register to Printer.
-
When message appears, check it and click OK.
The information is registered to the printer.
-
-
