
Speed Dial Utility Dialog
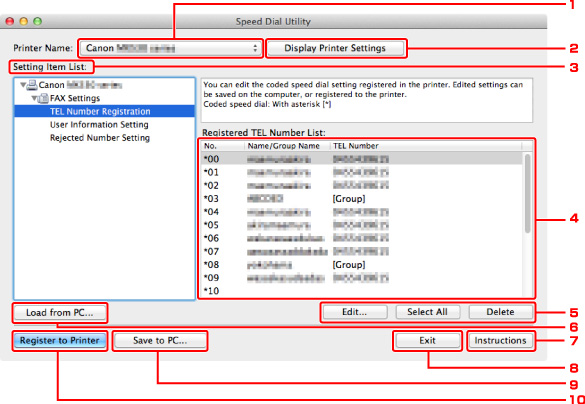
The following items are on the Speed Dial Utility dialog.
-
Printer Name:
Selects the machine for editing the registered information using Speed Dial Utility.
-
Display Printer Settings
Loads the registered information on the machine selected for Printer Name: into Speed Dial Utility.
-
Setting Item List:
Selects the registered information for editing. Choose one item from TEL Number Registration, User Information Setting, and Rejected Number Setting.
-
Registered information list
Displays the registered information selected for Setting Item List:.
-
Edit.../Select All/Delete
Edits/deletes the registered information or selects all the registered information selected for Setting Item List:.
When multiple items on the registered information list are selected, you cannot use the Edit... button.
-
Load from PC...
Displays the registered information saved on the computer.
-
Instructions
Displays this guide.
-
Exit
Quits Speed Dial Utility. Information registered or edited using Speed Dial Utility is neither saved on the computer nor registered on the machine.
-
Save to PC...
Saves information edited using Speed Dial Utility on the computer.
-
Register to Printer
Registers information edited using Speed Dial Utility to the machine.
