
Main Components
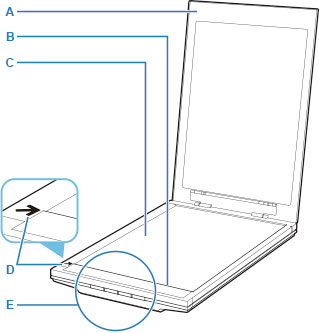
- A: Document Cover
- Presses down the placed item.
- B: Scanning Unit
- The main part of the scanner that emits light and scans items.
- C: Platen
- Place the item to be scanned.
- D: Alignment Mark
- Align a corner of the item with this mark.
- E: Scanner Buttons
-
You can scan easily according to your purpose by simply pressing a button.
- PDF button
- AUTO SCAN button
- COPY button
- SEND button
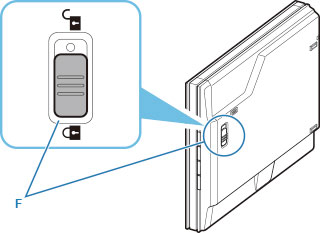
- F: Scanner Lock Switch
- Lock or unlock the scanning unit.
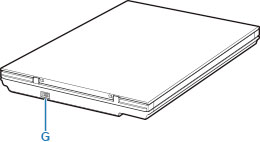
- G: USB Connector
- Connect the supplied USB cable.
![]() Important
Important
- There is no power switch or power lamp on the scanner. No AC adapter or power cord is required. When you connect a computer and the scanner with the USB cable and turn on the computer, the scanner also turns on.
- The scanner is designed to produce optimal results when connected to a USB 3.0 or higher port with the supplied USB cable. Connect the USB cable supplied with the scanner to a USB 3.0 or higher port.
- The supplied USB cable is for the scanner only. It cannot be used for other devices.
