Scanning in Basic Mode
Use the Basic Mode tab to scan easily by following the on-screen steps.
Refer to "Scanning Multiple Documents at One Time with ScanGear (Scanner Driver)" to scan multiple documents at one time.
 Important
-
The following types of documents may not be scanned correctly. In that case, click
 (Thumbnail) on the Toolbar to switch to whole image view and scan.
- Photos that have a whitish background
- Documents printed on white paper, hand-written text, business cards, etc.
- Thin documents
- Thick documents
-
The following types of documents may not be scanned correctly.
- Documents smaller than 1.2 inches (3 cm) square
- Photos that have been cut to various shapes
-
Place the document on the Platen, then start ScanGear (scanner driver).
-
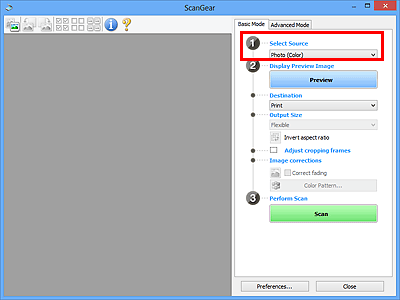
Set Select Source according to the document placed on the Platen .

 Note
Note- To scan magazines containing many color photos, select Magazine (Color).
-
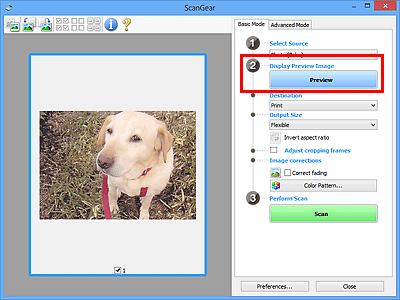
Click Preview.
Preview image appears in the Preview area.

 Note
Note- Colors are adjusted based on the document type selected in Select Source.
-
Set Destination.
-
Set Output Size according to purpose.
Output size options vary by the item selected in Destination.
-
Adjust the cropping frames (scan areas) as required.
Adjust the size and position of the cropping frames on the preview image.
-
Set Image corrections as required.
-
Click Scan.
Scanning starts.
 Note
Note
- Click
 (Information) to open a dialog box in which you can check the current scan settings (document type, etc.).
 - A response of ScanGear after scanning can be specified in Status of ScanGear dialog after scanning on the Scan tab of the Preferences dialog box.

