Setting the Destination
You can set a network folder as the destination for images scanned from the operation panel of the printer and for received fax data.
 Important
- Folders on a computer running OS X Yosemite v10.10 or later cannot be set as destination folders.
Adding Destination Folders
-
Open the Main Screen.
-
Select your printer from Printer List.
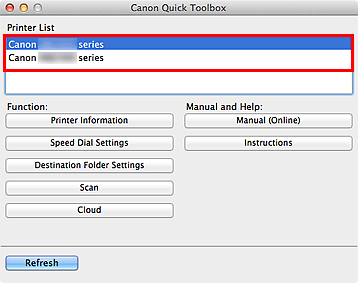
Items corresponding to the selected printer appear in Function.
 Note
Note- When your printer is not displayed in Printer List, click Refresh.
-
Click Destination Folder Settings from the items displayed in Function.
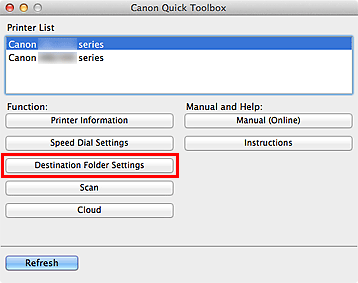
The Folder Setting Utility window appears.
-
Click Add....
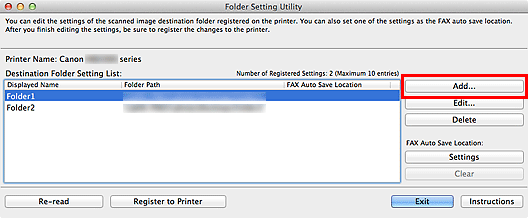
The Add Destination Folder window appears.
-
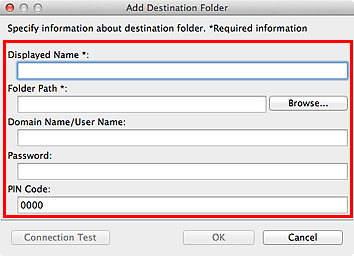
Enter the display name, folder path, etc.
 Important
- Displayed Name and Folder Path are required entry fields.
 Note
Note- Refer to "Add Destination Folder Window / Edit Destination Folder Window" for notes on entering each field.
-
Click Connection Test.
Check if you can connect to the specified folder.
 Important
-
Make sure of the following before performing Connection Test.
- The printer is turned on
- The printer is connected to the network
- Another software or user is not using the printer
- An error is not displayed on the operation panel of the printer
-
-
Check the message, then click OK.
-
Click OK in the Add Destination Folder window.
-
Click Register to Printer.
-
Check the message, then click OK.
Setting the Auto Save Location for Fax Data
Set one of the folders displayed in Destination Folder Setting List as the auto save location for fax data.
-
Open the Main Screen.
-
Select your printer from Printer List.

Items corresponding to the selected printer appear in Function.
 Note
Note- When your printer is not displayed in Printer List, click Refresh.
-
Click Destination Folder Settings from the items displayed in Function.

The Folder Setting Utility window appears.
-
Select one of the folders you want to use as the save location from Destination Folder Setting List, then click Settings.
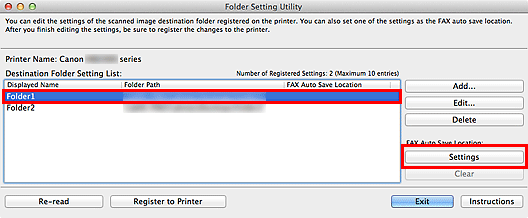
 Note
Note-
When no folder is displayed in Destination Folder Setting List, add a destination folder.
- If a PIN code entry screen appears, enter the code.
-
-
Check the message, then click OK.
 (Checkmark) appears in FAX Auto Save Location of the set folder.
 -
Click Register to Printer.
-
Check the message, then click OK.

