
HDR Print
Print images shot with a wide dynamic range by optimizing them for the paper.
![]() Important
Important
- Available when started from Digital Photo Professional V.4.9.20 or later and an HDR PQ compatible RAW image is selected.
- This function is unavailable if you are using a 32-bit operating system.
-
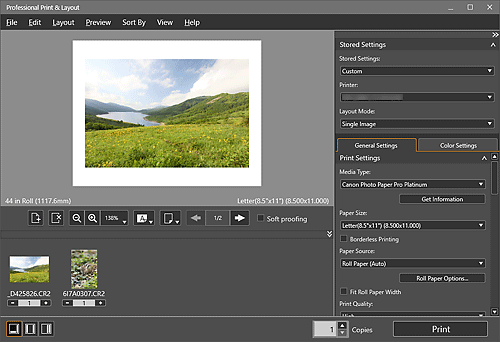
In Digital Photo Professional, select the folder containing the image you want to print.
-
Select the image you want to print.
-
From the File menu of Digital Photo Professional, select Plug-in printing > Print with Professional Print & Layout.
Professional Print & Layout starts.
-
In the Stored Settings area, set the printer and Layout Mode you want to use, and other settings.
-
In Print Settings on the General Settings tab, set Media Type, Paper Source, Print Quality, and other settings.
-
In Color Management on the General Settings tab, select Use ICC Profile for Color Mode.
-
Select the HDR Print checkbox.
-
Click Settings....
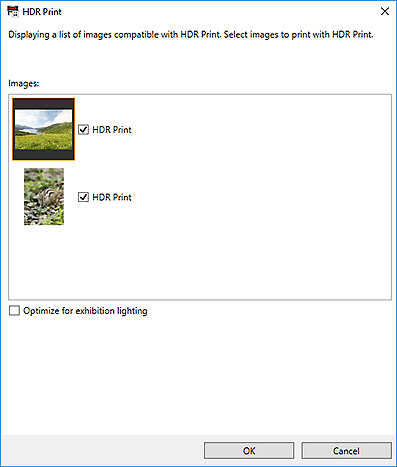
The HDR Print dialog box appears.
-
Select the checkbox(es) of the image(s) for which you want to use HDR Print, and then click OK.
 Note
Note- Double-click an image to display the Preview dialog box for previewing the image with and without HDR Print.
-
Click Print.
The Print dialog box appears.
-
Click OK.
![]() Note
Note
- For the HDR Print dialog box, see HDR Print Dialog Box.
