Adjusting Color Balance by Viewing Patterns
Adjust the color balance by printing and viewing a pattern with which you can check the color balance of the image.
 Important
- This function is unavailable when Gallery Wrap is selected for Layout Mode in the Stored Settings area.
-
In the Preview area, select the image of which you want to print a pattern.
-
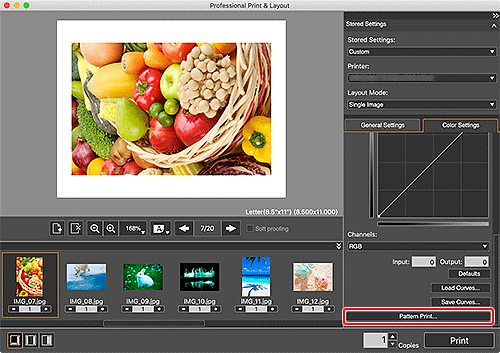
In Color Settings on the Color Settings tab, click Pattern Print....

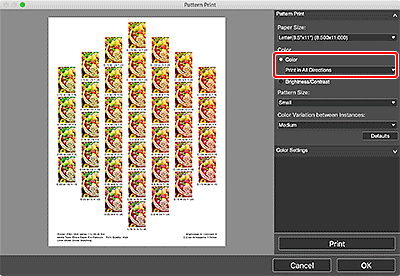
The Pattern Print window appears.
-
Select Paper Size according to the paper to be used for Pattern Print.
-
Select Color in Color.

-
Select the color direction in which you want to adjust.
 Note
Note-
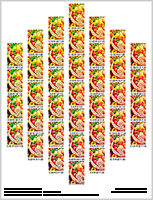
Select Print in All Directions to print a pattern adjusted in the following six color directions. You can check the color direction in which you want to adjust the color balance.

Print in Direction R (upper right): Red Print in Direction Y (up): Yellow Print in Direction G (upper left): Green Print in Direction C (lower left): Cyan Print in Direction B (down): Blue Print in Direction M (lower right): Magenta -
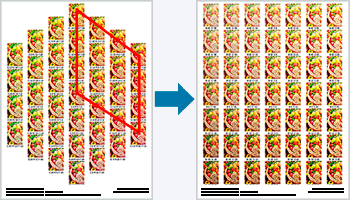
Select a specific color direction to print a pattern adjusted in the selected color direction. For example, select Print in Direction R to print a more detailed pattern of the area in the R direction (framed area) of the pattern for all directions; you can check more variations than in all directions.

-
-
Select Pattern Size and Color Variation between Instances.
-
Finely adjust the color tone in Color Settings as needed.
 Note
Note- The black and white tone can be adjusted only when Black and White Photo is set for Color Mode in Color Management on the General Settings tab.
- For how to adjust the color tone, see Adjusting Color Balance, Brightness, and Contrast.
-
Click Print.
The Print dialog appears.
-
Click OK.
The pattern is printed.
-
From the printed pattern, enter the values described under the image with the desired color balance into Color Balance.
-
Click OK in the Pattern Print window.
The Pattern Print window closes; the values are reflected in Color Balance in the main screen.
 Note
Note
-
To perform Pattern Print only for a portion of the image, display the Pattern Print window after following the steps below.
- In the main screen, duplicate the image of which you want to print a pattern.
- Crop the duplicate image.
After completing Pattern Print and adjustment, delete the duplicate image.
- For the Pattern Print window, see Pattern Print Window.

