
Preview Area
Displays a preview of images. Check it while making edits or adjusting margins; the settings are reflected as you make them.
![]() Note
Note
- When Fit Screen is set for the preview scale, the paper size is displayed at the lower right of the Preview area. (Except when Multiple Images (Auto Nesting) is set for Layout Mode.)
- When roll paper is selected for Paper Source and Fit Screen is set for the preview scale, the selected roll paper width is displayed at the lower left of the Preview area.
- To check the file name and other image information, place the cursor over an image in the Preview area.
- The displayed items vary depending on your printer.
When you click the image or margin in the Preview area, one of the following three menus appears accordingly.
When Slot Is Clicked
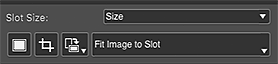
- Slot Size
-
- Custom paper size/standard size
- Enlarges or reduces the slot to the size selected from the list.
- Image Size
- Enlarges or reduces the slot to the original image size.
- Fit To Paper Size
-
Enlarges or reduces the slot to Paper Size in Print Settings.
 Note
Note- When Multiple Images (Auto Nesting) is selected for Layout Mode in the Stored Settings area, the slot is enlarged or reduced to A4 size.
- Fit To Roll Paper Width
- Enlarges or reduces the slot so that the image width matches the roll paper width.
- Specify Custom Size
- Displays the Custom Paper Size dialog for setting a custom size. The set size appears in Slot Size.
 (Add Image)
-
In the displayed window, select the image you want to add.
 Important
- If started from Digital Photo Professional, Photoshop, Photoshop Elements, or Lightroom, this function is unavailable.
Note- If an image is already placed, that image will be replaced with the selected image.
 (Crop)
- Displays the Crop window for cropping the image.
 (Rotate Image)
-
 (Rotate Right)
- Rotates the image 90 degrees clockwise.
 (Rotate Left)
- Rotates the image 90 degrees counterclockwise.
- Image Layout Method
-
- Fit Image to Slot
- Displays the entire image within the slot.
- Fill Slot with Image
- Displays the image without borders so that there is no gap within the slot.
When Slot Is Control-Clicked
- Delete
- Deletes the image.
- Copy
- Copies the image.
- Rotate
-
- Rotate Right
- Rotates the slot and image 90 degrees clockwise.
- Rotate Left
- Rotates the slot and image 90 degrees counterclockwise.
- Align
-
- Center
- Places the image in the center of the paper.
- Center Horizontally
- Centers the image horizontally in the middle of the paper.
- Center Vertically
- Centers the image vertically in the middle of the paper.
Note- When Multiple Images (Auto Nesting) is selected for Layout Mode in the Stored Settings area, only Center Horizontally is displayed.
- Change order
-
- Bring to Front
- Moves the image to the front.
- Send to Back
- Moves the image to the back.
When Margin Is Control-Clicked
- New slot
- Creates a slot of the selected paper size.
- Paste
- Pastes the image.
- Slot Auto Nesting
-
Automatically places images apart from each other.
Note- This is displayed only when Multiple Images (Auto Nesting) or Multiple Images is selected for Layout Mode in the Stored Settings area.
