3. Printing with Professional Print & Layout
When development/correction is completed, print with Professional Print & Layout.
Steps
-
Start Professional Print & Layout.
When using Professional Print & Layout only
For how to start it, refer to Professional Print & Layout Guide.
 Note
NoteOnly JPEG and TIFF format images can be opened.
Starting from supported application
In a supported application, select the image you want to print, and then navigate as follows from the File menu.
-
Digital Photo Professional
Select Plug-in printing > Print with Professional Print & Layout.
-
Photoshop
Select Automate > Canon Professional Print & Layout....
-
Photoshop Elements
Select Automation Tools > Canon Professional Print & Layout....
-
Lightroom
Select Plug-in Extras > Canon Professional Print & Layout....
Professional Print & Layout starts.
-
-
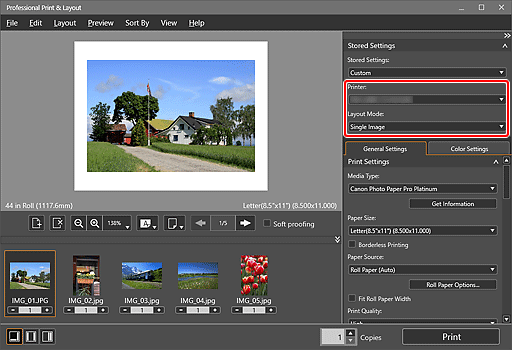
Select the printer and Layout Mode you want to use.

-
Specify media type, layout, and color management, and then click Print.
Printing starts.
If the print result is not satisfactory, repeat the correction and printing steps.
![]() Tip
Tip
Pattern Print Function of Professional Print & Layout
Prints a pattern of images with slightly varying colors on a sheet of paper. This is convenient when searching for a print result that is closer to what you want.
For details on Pattern Print, see Color Adjustment in Color Printing.
![]() Note
Note
You can print with various settings in Professional Print & Layout.
For details, see Lesson 3 Utilizing Professional Print & Layout.

