Adjusting Tone
When printing black and white photos, you can produce the cooling effects of cool colors and the warming effects of warm colors.

|

|

|
|
Cool is selected |
Standard is selected |
Warm is selected |
The procedure for adjusting tone is as follows:
Open the printer driver setup window
Select the media type
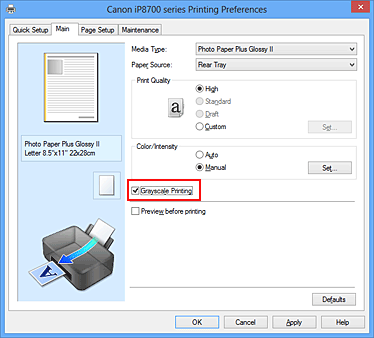
For Media Type on the Main tab, select Photo Paper Plus Glossy II, Photo Paper Pro Platinum, Photo Paper Pro Luster, Photo Paper Plus Semi-gloss or Other Fine Art Paper.
Set grayscale printing
Check the Grayscale Printing check box.

Select the manual color adjustment
Select Manual for Color/Intensity, and click Set....
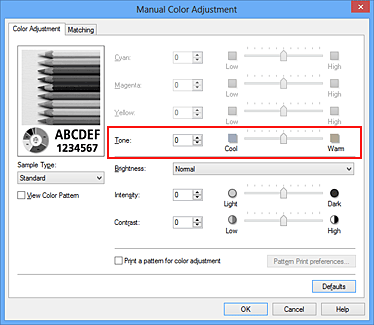
The Manual Color Adjustment dialog box opens.
Adjusting monochrome tones
Moving the Tone slider to the right brings out the warm colors (warm tones), and moving it to the left brings out the cool colors (cool tones).
You can also directly enter a value linked to the slider. Enter a value in the range from -50 to 50.After adjusting the tones, click OK.

Complete the setup
Click OK on the Main tab.
When you execute print, the color document is converted to grayscale data with adjusted tones. It allows you to print the color document in monochrome.

