Printing By Setting Print Purpose
The print settings that are generally used frequently are pre-registered as print purposes. By using a print purpose to print, you can print with settings that match the document.
The procedure for printing by using a print purpose is as follows:
Open the printer driver setup window
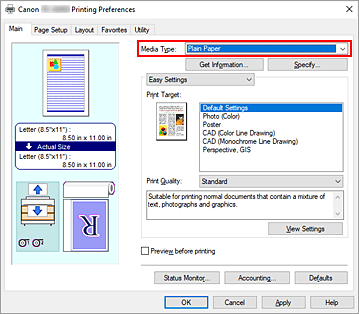
Select the media type
Select the type of paper loaded in the printer from the Media Type list on the Main tab.
If Auto (Use Printer Settings) is selected, the paper configured in printer settings is printed.
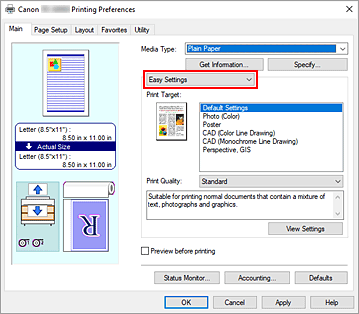
Select print setting mode
From the pull-down menu, select Easy Settings.

Select print purpose
For Print Target, select the setting that matches the document.
- Default Settings
- Select this setting to print a general document such as a business documents.
- Photo (Color)
- Select this setting to print a color illustration or a photo.
- Poster
- Select this setting to print a poster.
- CAD (Color Line Drawing)
- Select when printing data such as drawings.
- CAD (Monochrome Line Drawing)
- Select when printing data such as drawings in monochrome.
- Perspective, GIS
- Select when printing data such as perspectives and GIS.
 Note
Note- To check the settings of the items that are set by Print Target, click View Settings.
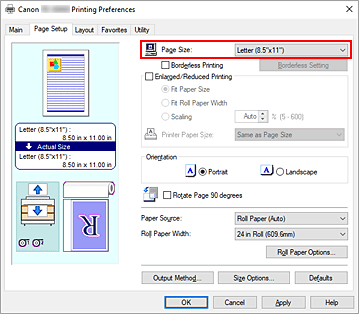
Select the paper size
From the Page Size list on the Page Setup tab, select the same size as that of the document that was created with the application software.
The current settings are displayed in the settings preview on the left side of the window.
Select the paper source
For Paper Source, select the setting that matches your purpose.
Set the other items
Set the other items as necessary.
Complete the setup
Click OK.
When you print, the document is printed with settings to match the specified print purpose.

