
Setting the Print Quality Level (Custom)
Custom on the Print Quality tab allows you to set detailed print quality levels.
The procedure for setting the print quality level is as follows:
Open the printer driver setup window
Select advanced settings
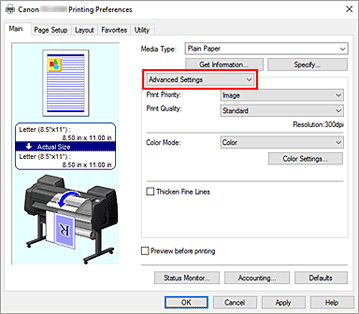
From the Main tab pull-down menu, select Advanced Settings.
Select the print quality
For Print Quality, select Custom.
The Custom dialog box opens.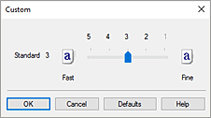
 Important
- If Auto (Use Printer Settings) is selected for Media Type, Custom cannot be selected.
Setting the print quality level
Drag the slider bar to select the print quality level and click OK.
Important- Certain print quality levels cannot be selected depending on the settings of Media Type.
Complete the setup
Click OK on the Main tab.
When you execute print, the image data is printed with the selected print quality level.
