Setting Accounting Information
By setting accounting information, you add IDs to print jobs, and use the printer and cost management tool to tabulate print history information for any ID. You can also lock accounting information, or require this information be entered before printing.
The procedure for setting accounting information is described below. To lock accounting information or require it to be entered, refer to Setting Accounting Information from Printer properties to change the settings.
Entering Accounting Information for Print Jobs
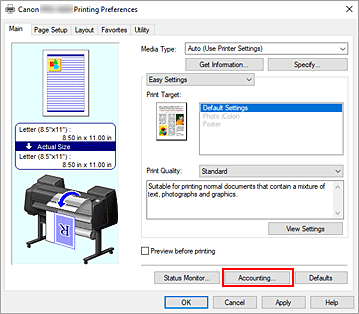
Open the printer driver setup window
Click Accounting... on the Main tab

The Accounting dialog box opens.
If necessary, complete the settings
- If required fields are left blank, a warning will be displayed and printing cannot be started.
 Note
Note
Setting Accounting Information from Printer properties
Administrators can use the following settings to lock accounting information or require it to be entered.
Display the Devices and Printers window
Select the Control Panel -> Hardware and Sound (Hardware) -> Devices and Printers.
The Devices and Printers window is displayed.Display setup window
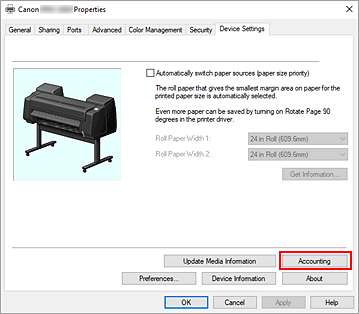
Right-click the "Your model name" icon, and select Printer properties.
The printer's properties window appears.Click Accounting on the Device Settings tab

The Accounting dialog box opens.
If necessary, complete the settings
If you want to require accounting information, check the check box to make each item required.
To prevent changes to accounting information, check the checkbox to set each item as fixed.After completing the setting, click OK to return to the Device Settings tab.
 Note
Note- If you made accounting information a required field, you need to enter accounting information in the Accounting dialog box in the Main tab. Printing will not start until you do this.
Apply the settings
Click OK or Apply.
The settings are enabled hereafter.
