Printing Document in Center of Paper
When you want to position the source document in the middle of the cut paper and print, or print with even margins on the right and left in relation to the width of the roll paper, use the Print Centered function.
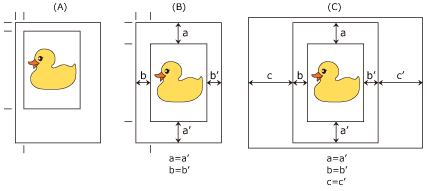
The print results when setting with Print Centered are as follows. Normally, if Print Centered is set when printed as in (A), it will be printed as in (B) for cut paper and (C) for roll paper.

|
 Note
Note
- When setting the magnification using Scaling from Enlarged/Reduced Printing on the Page Setup tab and printing, the start point for enlarge/reduce will always be fixed based on the top left corner of that page. For that reason, for reduced printing, the bottom and right margins of the paper will increase. At this time, if you place a checkmark next to Print Centered on the Layout tab, the top, bottom, left and right margins can all be printed evenly.
The procedure for printing in the center of the paper is as follows:
Open the printer driver setup window
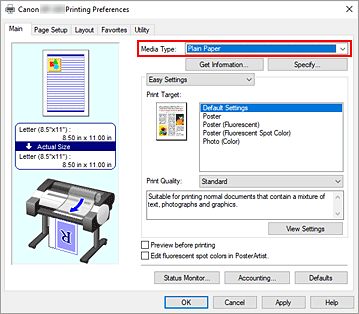
Select the media type
Select the type of paper loaded in the printer from the Media Type list on the Main tab.

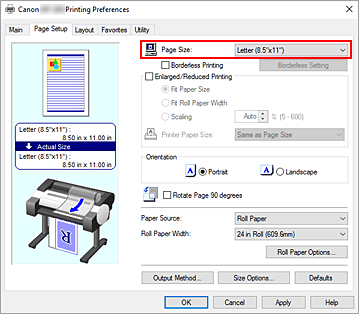
Select the paper size
Select the size of the paper you want to print from Page Size on the Page Setup tab.

Set magnification as necessary
Where necessary, attach a checkmark next to Enlarged/Reduced Printing, and set according to the objective.
Select the paper source
For Paper Source, select the setting that matches your purpose.
Select roll paper width
If you selected a roll paper for Paper Source, set Roll Paper Width to the width of the roll paper loaded in the printer.
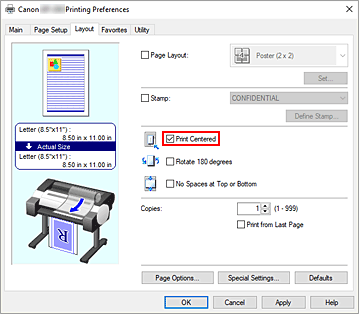
Print document in the center of paper
Select the Print Centered check box on the Layout tab.

Complete the setup
Click OK.
When you print, the document is printed in the center of the paper.

