Printing to Oversized Paper Sizes
When printing a created document so that it fills the entire paper width, select a paper size from the "XXX oversize" (sizes resulting from adding margins necessary for printer operation to the document sizes) so that all areas of the document are printed at their actual size.
A printout that has the same area as the document can be obtained by trimming the outer margins after printing.

|

|

|
The procedure for printing with oversize is as follows:
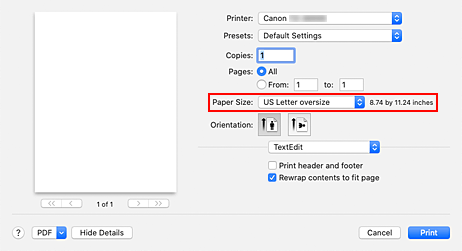
Select oversized paper size
In the Print dialog, select "XXX oversize" for Paper Size.

Select Quality & Media from the pop-up menu
Select the paper source
For Paper Source, select the paper source that matches your purpose from Roll Paper (Auto), Roll 1, and Roll 2.
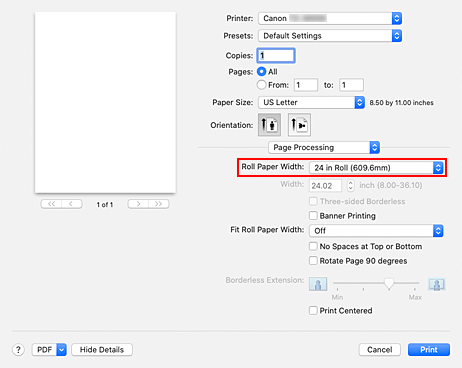
Select Page Processing from the pop-up menu
Select roll paper width
Set Roll Paper Width to the width of the roll paper loaded in the printer.

Complete the setup
Click Print.
When you print, the document is printed so that it fills the paper width.
 Important
- When printing to oversized paper sizes, use paper that has the following necessary margins added to the document size.
- Cut sheet: 6 mm or more added to width and 23 mm or more added to height of document size
- Roll paper: 6 mm or more added to width and 6 mm or more added to height of document size
 Note
Note
- An oversized paper size cannot be used for the largest paper size that can be loaded in the printer.

