Changing the Clear Coating Settings
When you execute clear coating, the printer applies Chroma Optimizer (CO) ink onto the printing surface and allows you to adjust the glossiness.
This section explains procedures for changing the clear coating settings.
Select Advanced Paper Settings from Printer Options in the Print Dialog
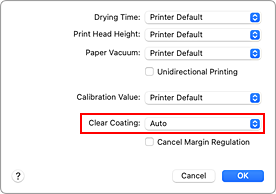
Set clear coating
Select the Clear Coating item that matches your purpose.
 Note
Note- The available menu items differ depending on the paper type and print quality.
- Auto
- The printer automatically sets the areas to be clear-coated and whether clear coating is to be executed.
- Overall
-
The printer clear-coats the entire area, including the margins outside the image area.
Clear-coating the entire area improves the overall glossiness, including the margins.
This option uses the most Chroma Optimizer (CO) ink. - Printed Areas
- Use this option when you want to improve the glossiness only in the image area. White areas (including margins) are not clear-coated.
- None
-
Printing will proceed without clear coating.
Compared to if clear coating is applied, the image quality may deteriorate, or the printed surface may be damaged.Note- Select None if clear-coating is not required, such as when laminating after printing.
 Important
- On the Quality & Media, look at Media Type. If a media type other than Photo Paper Pro Premium Matte A, Photo Paper Pro Platinum, Photo Paper Pro Luster, Photo Paper Plus Semi-gloss, Lightweight Photo Paper, Heavyweight Photo Paper, or Baryta Photo Paper is selected, you can select Auto only.
Complete the setup
Click Print
When printing is executed, the clear coating effect that was set is added when the document is printed.
