Adjusting the Color Tones of Black and White Photos by Looking at Patterns (Print Studio Pro)
Adjust the color tone of a black and white photo by printing and viewing a pattern with which you can check the color tones of the black and white photo.
-
Select the image of which you want to print a pattern.
-
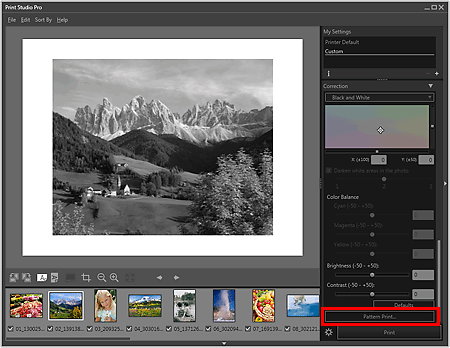
Click Pattern Print... in Correction.

The Pattern Print window appears.
-
Finely adjust the color tone in Correction as needed.
 Note
Note- Refer to "Adjusting the Tones of Black and White Photos" for how to adjust the color tone.
-
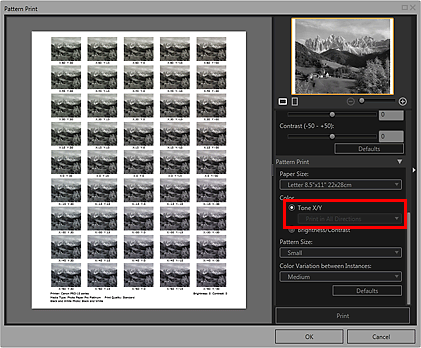
Select Paper Size according to the paper to be used for Pattern Print.
-
Select Tone X/Y in Pattern Print.

 Important
- Tone X/Y is not available when using Pro9500 Mark II series or Pro9000 Mark II series. As with color printing, select the color direction in which you want to adjust in Color and perform Pattern Print. Refer to "Adjusting the Color Balance by Looking at Patterns (Print Studio Pro)" to set the color direction.
-
Select Pattern Size and Color Variation between Instances.
-
Click Print.
The Print dialog box appears.
-
Click OK.
The pattern is printed.
-
From the printed pattern, enter the values described under the image with the color tone you want into the X-coordinate and Y-coordinate.
-
Click OK in the Pattern Print window.
The Pattern Print window closes; the values are reflected in the black and white color tone adjustment space in the main screen.
 Note
Note
- You can also change the print area used for Pattern Print. See "Pattern Print Window" for details.

