
启动Print Studio Pro
Print Studio Pro可以从Digital Photo Professional、Adobe Photoshop、Adobe Photoshop Elements或Adobe Photoshop Lightroom启动。
从Digital Photo Professional启动
-
在Digital Photo Professional中选择要打印图像所在的文件夹。
-
选择要打印的图像。
-
从Digital Photo Professional的文件菜单上,选择插件打印 > 用Print Studio Pro打印。
Print Studio Pro启动。
 重要事项
- 没有在Digital Photo Professional中选中图像时,无法启动Print Studio Pro。
从Photoshop、Photoshop Elements或Lightroom启动
-
在Photoshop、Photoshop Elements或Lightroom中打开要打印的图像。
-
从文件菜单中,操作如下:
Photoshop
单击自动 > Canon Print Studio Pro...。
Photoshop Elements
单击自动工具 > Canon Print Studio Pro...。
Lightroom
单击增效工具额外信息 > Canon Print Studio Pro...。
Print Studio Pro启动。
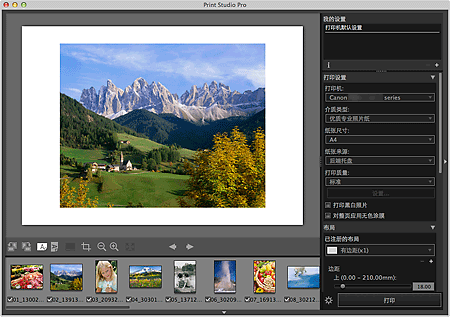
重要事项
- Photoshop、Photoshop Elements或Lightroom中未显示任何图像时,无法启动Print Studio Pro。
-
如果即使安装Print Studio Pro之后,Photoshop、Photoshop Elements或Lightroom的菜单上仍没有出现Print Studio Pro,请按照以下步骤安装Photoshop插件程序。
- 退出Photoshop、Photoshop Elements或Lightroom。
- 从Finder的转到菜单中选择应用程序,然后双击Canon Utilities文件夹、Print Studio Pro文件夹,然后双击Plug-In Install图标。
-
请按照屏幕上的说明进行安装。
- 如果从没有启动过Photoshop、Photoshop Elements或Lightroom,可能无法安装Photoshop插件程序。
- 如果使用Lightroom,Photoshop插件程序需要根据不同用户分别进行安装。 如果计算机上有多个用户帐号,请根据不同用户分别进行安装。
- 如果使用图层功能在Photoshop或Photoshop Elements中创建或编辑图像,图像可能无法在Print Studio Pro中显示。 在这种情况下,在Photoshop或Photoshop Elements中合并图像和图层。
