
Producing Creative Layouts
As for works of art displayed at a museum or gallery, the photos are wonderful in themselves, but their layouts (size, margins, frames, etc.) are also well considered. Be creative with the layout as well, since the impression of the same printed photo will differ completely depending on the layout.
Point for Development/Correction: "Cropping"
Cropping is also one of the important points for creating works of art as you wish. If there is something unnecessary shot into the edge of the photo, you can cut it off using image editing software after shooting. Digital Photo Professional also has a function for adjusting angles for cropping, which is convenient to adjust angles of photos containing the horizon, skyline, etc. However, note that extensive cropping may reduce the number of pixels and may consequently degrade the image quality of printed materials.
See "Numbers of Pixels and Print Sizes" for the number of pixels.
Point for Printing 1 "Differentiate Top and Bottom Margins"
When a photo is framed, it appears shifted downward even if it is centered; set the bottom margin of the photo slightly wider than the top margin to make it look centered in the frame. Adjust the margins so that the top to bottom ratio is around 45 to 55.
See "Adjusting Margins" for details on margin adjustment.

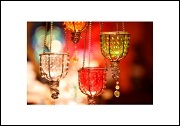
Point for Printing 2 "Try Making the Margins Black"
Some works of art may stand out more with black margins. In addition, this is effective when you want to change the atmosphere easily.
 |
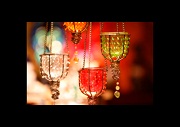 |
| When margins are white | When margins are black |
See "Printing Margins in Black" for details on the setting to make margins black.


