Correct View
You can correct still images captured from a video.
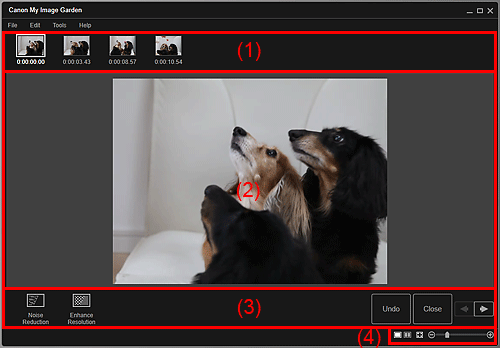
Select the still image(s) you want to correct in the Captured Images area of the Video Frame Capture view, then click Correct at the bottom of the screen to switch to the Correct view.
 Note
Note
- When a frame in which the subject or camera has moved significantly is captured, the still image may not be corrected properly.

(1) Selected Images Area
Displays the thumbnails of the still image(s) selected in the Video Frame Capture view.
The  (Correction) mark appears on the thumbnails of corrected still images.

 (Left Scroll)/(Right Scroll)
- Scrolls the Selected Images area left or right to display the hidden thumbnails.
(2) Preview Area
Displays the previews of the still images selected in the Selected Images area.
(3) Operation Buttons
 Noise Reduction
- Reduces noise (tonal variation that may appear in images taken in dark locations such as night scenes using a digital camera).
 Enhance Resolution
- Reduces jaggies (roughness in images).
- Undo
- Restores the original uncorrected state.
- Close
- Switches to the Video Frame Capture view.
 (Previous Image/Next Image)
- Switches the preview display when there are multiple images in the Selected Images area.
(4) Display Size Setting Bar
 (Display Correction Screen)
- Switches to the preview (correction screen).
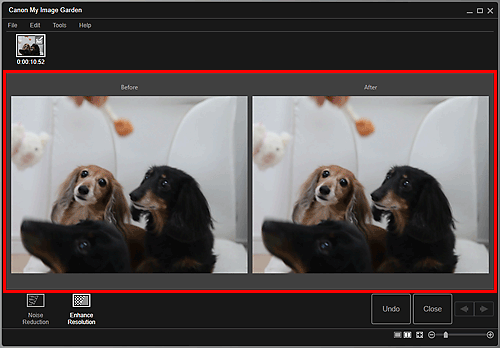
 (Display Comparison Screen)
-
Displays the images before and after the correction side by side in preview so that you can compare them.

- Before
- Displays the image before correction.
- After
- Displays the image after correction.
 (Whole Image View)
- Fits the preview to the area size.
 (Reduce/Enlarge)
- Click
 (Reduce) or
  (Enlarge) to reduce or enlarge the display size. You can also freely change the display size by dragging the slider.

