

You can scan easily by automatically detecting the item type.
Make sure that your scanner or printer is turned on.
Place the item on the platen or ADF (Auto Document Feeder) of your scanner or printer.
 Note
NoteRefer to "Placing Items (When Scanning from a Computer)" for your model from Home of the Online Manual for how to place items.
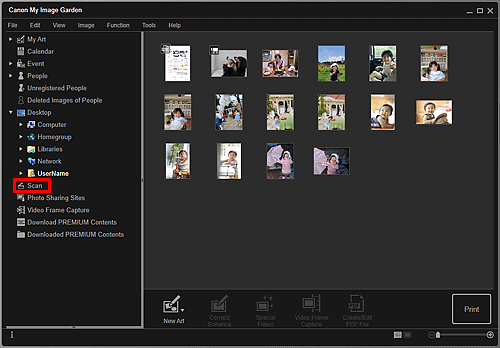
Click Scan.

The view switches to Scan.
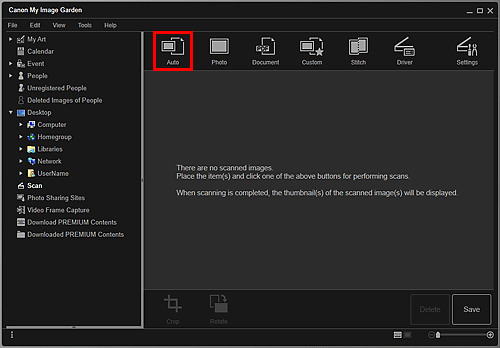
Click Auto.

Scanning starts.
 Note
NoteRefer to "Settings (Auto Scan) Dialog Box" for your model from Home of the Online Manual to specify the scan settings.
Click Cancel to cancel the scan.
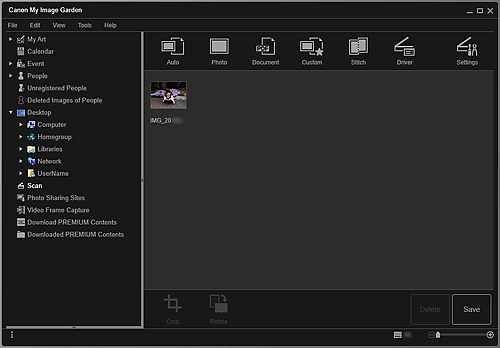
When scanning is completed, the image appears as a thumbnail.

 Note
NoteYou can rotate the selected image 90 degrees clockwise each time you click Rotate.
You can crop images.
Click Save to save rotated or cropped scanned images.
You can set the save location for scanned images on the Advanced Settings tab of the Preferences dialog box displayed by selecting Preferences... from the Tools menu. Refer to "Advanced Settings Tab" for details on the setting procedure.
 Note
NoteYou can also print scanned images. Right-click a thumbnail and select Print... from the displayed menu to display the Print Settings dialog box. Select the printer and paper to use, then click Print.
Page top |