


Register the information of people to images so that you can browse the images by person.
 Registering People from the Unregistered People View
 Registering People from the Details View
 Important
The information of people can only be registered to images saved in folders subject to image analysis. Refer to "Image Analysis Settings Tab" for how to set folders that are subject to image analysis.
Photos containing people appear automatically in the Unregistered People view as a result of image analysis. You can register images that are identified as those of the same person, at once, or register images one by one.
Click Unregistered People.
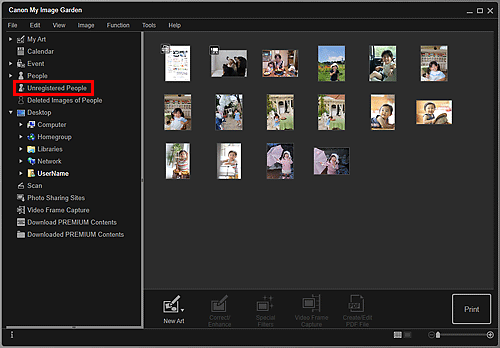
The view switches to Unregistered People.
 Note
NoteIdentifying people appears during image analysis.
Images may not be correctly identified as those of the same person depending on the face status (expression, glasses, angle, etc.).
Areas that are not of people in photos may be identified as people. To remove, right-click the image and select Delete from the displayed menu, or drag and drop it to Deleted Images of People in Global Menu. The image is moved to the Deleted Images of People view.
Image analysis only applies to images saved in folders subject to image analysis. Refer to "Image Analysis Settings Tab" for details on image analysis.
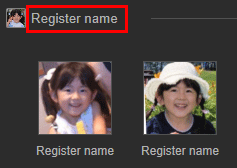
Click Register name, then enter the name.
Click Register name displayed next to the smaller thumbnail, then enter the name.
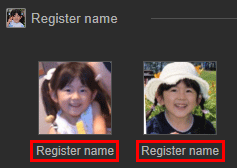
Select a larger thumbnail and click Register name displayed below it, then enter the name.
A registration completion message appears and the image(s) is (are) registered to the People view.
 Note
NoteWhen a registered name is entered, its image(s) and the name(s) appear in the pull-down menu. To register as the same person as the registered person, select the name in the pull-down menu. To register as a different person, click an area outside the white frame to complete the name entry.
For registered people, you can also register by dragging and dropping the thumbnail to the name displayed below People in Global Menu.
If a person is identified as a different person, register the name individually or drag and drop the thumbnail to the name displayed below People in Global Menu.
To delete a registered person, right-click the person in the People view and select Delete from the displayed menu. Images whose names of people have been deleted appear as those of unregistered people in the Unregistered People view.
You can also set the profiles of registered people, such as their relationships with you and their birthdays.
You can register people by specifying the face area in the image preview. People can be registered one by one even when there are multiple people in one photo.
Switch the image to the details view.
Select an image or images in the Calendar view set to Day View, the expanded display of the Event view, the expanded display of the People view, the Unregistered People view, or folder view, then click  (Details View) at the bottom right of the screen to switch to the details view.
Click Specify Person.
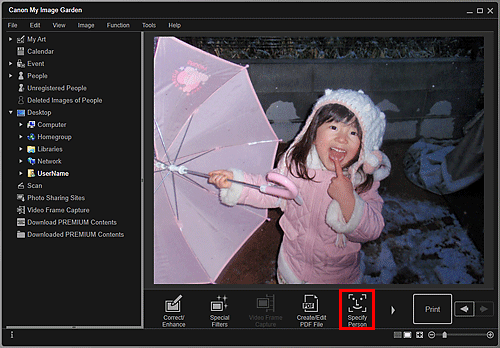
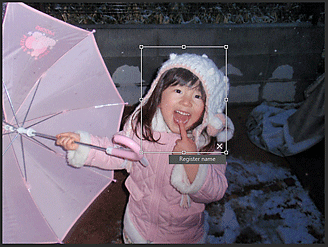
A white frame to specify the area to register appears on the image.
Specify the area of the person you want to register.
Drag the white frame on the image to specify the area to register. The area specified here appears as the thumbnail in the People view.
 Note
NoteClick  (Close) to remove the white frame.
Click Register name below the white frame, then enter the name of the person to register.
Click an area outside the white frame.
A registration completion message appears and the image(s) is (are) registered to the People view.
 Note
NoteWhen a registered name is entered, its image(s) and the name(s) appear in the pull-down menu. To register as the same person as the registered person, select the name in the pull-down menu. To register as a different person, click an area outside the white frame to complete the name entry.
To delete a registered person, right-click the person in the People view and select Delete from the displayed menu. Images whose names of people have been deleted appear as those of unregistered people in the Unregistered People view.
You can also set the profiles of registered people, such as their relationships with you and their birthdays.
 Important
When the file name of an image is changed or an image is moved, the registered information of people may be lost.
Even if you copy images with information of people registered, the registered information of people will not be retained.
Page top |