

You can make fine adjustments to the overall brightness, contrast, etc. of images.

Select the image(s) you want to adjust.
Click Correct/Enhance at the bottom of the screen.
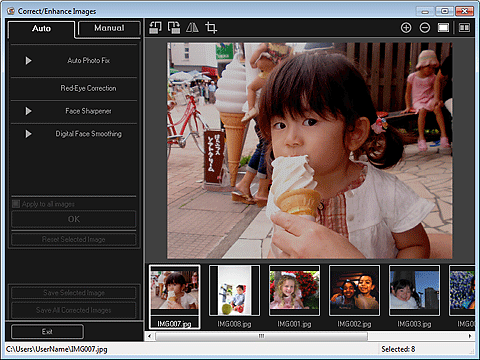
The Correct/Enhance Images window appears.

Select the image you want to adjust from the Selected Images area.
The selected image appears in the Preview area.
 Note
NoteIf only one image is selected, only the preview appears and the Selected Images area does not appear.
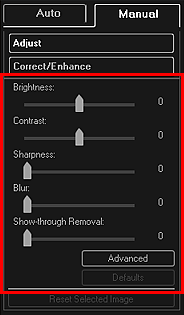
Click Manual, then click Adjust.
Move the slider of each item to adjust the level.
The following adjustments are available:
Brightness
Contrast
Sharpness
Blur
Show-through Removal

The image is adjusted and the  (Correction/Enhancement) mark appears on the upper left of the image.
 Note
NoteClick  (Display Comparison Screen) to display the images before and after the adjustment side by side so that you can compare and check the result.
Click Advanced to make fine adjustments to the image brightness and color tone. See Advanced in "Correct/Enhance Images Window" for details.
Click Defaults to undo all adjustments.
Click Save Selected Image or Save All Corrected Images.
Adjusted image(s) is (are) saved as a new file(s).
 Note
NoteTo save only the image(s) you like, select it (them) and click Save Selected Image. Click Save All Corrected Images to save all the adjusted images at one time.
The adjusted image(s) can be saved in JPEG/Exif format only.
Click Exit.
 Important
If the adjusted image(s) is (are) not saved, the adjustment(s) will be deleted.
Page top |