Adding/Adjusting Text Boxes
In the Item edit screen, you can add text boxes to photo layouts, collages, cards, and disc labels (CD/DVD/BD). You can also adjust the positions, shapes, etc. of text boxes.
 Important
- This function may not be available depending on the theme of your item.
- Vertical text boxes cannot be added depending on your environment.
- You cannot adjust circular text boxes set in some disc label (CD/DVD/BD) layouts.
 Note
Note
- You can add horizontal or vertical text boxes to photo layouts, collages, and cards. To disc labels (CD/DVD/BD), you can add circular text boxes as well as horizontal or vertical ones.
- Refer to "Item Edit Screen" for how to switch to the Item edit screen.
- Photo layout editing is used as an example in the following descriptions. Available settings may vary depending on what you create.
Adding a Text Box
-
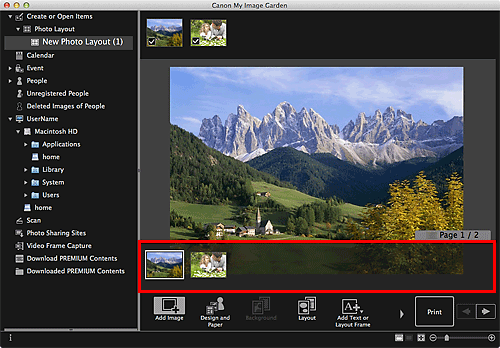
In the Page Thumbnails area, select the page to which you want to add a text box.

 Note
Note- If the Page Thumbnails area is not displayed, click the bar above the operation buttons.
-
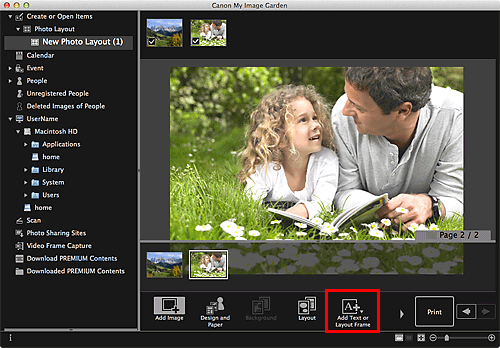
Click Add Text or Layout Frame.

-
Select Text (Horizontal), Text (Vertical), or Text (Arch) from the displayed menu.
The cursor changes to
 (Specify Text Box Area).
 Note
Note-
Vertical text boxes cannot be added depending on your environment.
-
-
Drag the cursor over the target location to specify the size of the text box.
The text input palette in which you can enter text appears below the added text box.
Adjusting the Text Box
-
In the Page Thumbnails area, select the page in which you want to adjust a text box.

-
Move the cursor over the text you want to adjust.
When you place the cursor over the frame of a text box, the cursor changes to
 (Move Text Box). Click the frame to display the text box adjustment palette.
 -
Use the text box adjustment palette to adjust the angle, text box position, and background color.

(1) Rotation/Alignment
 (Rotate 90°)
- Rotates the text box 90 degrees clockwise with each click.
 (Order)
- Click to display the menu. You can change the display order of text boxes.
 (Align or Distribute)
- Click to display the menu. You can change the alignment/distribution of text boxes.
 Note
Note- When an option such as Align Left is selected with the Align to Page checkbox selected, alignment/distribution is performed relative to the page.
- Align Selected Objects is available when multiple text boxes or image layout frames are selected.
- Alignment/distribution settings are not available for circular text boxes.
(2) Background Color

 (No Background Color)/(Use Background Color)
- The buttons switch when clicked. For
 (Use Background Color), the following settings will be applied to the background of the text box.
  (Color Setting)
- Click to display the Colors dialog. Select the color you want to set.
(3) Transparency
 (Transparency Slider)
- Click
 (Decrease Transparency) or
  (Increase Transparency) to adjust the transparency of the text box by 10%. You can also freely change the transparency by dragging the slider.
 Note
Note- You can drag the frame of the text box to adjust its position.
- You can drag the four corners of the text box to adjust its size.
- When you move the cursor over a corner of the text box, the cursor changes to
 (Free Rotation), allowing you to freely rotate the text box by dragging it.
 - From the menu displayed by control-clicking a text box, you can cut, copy, or delete the text box, or change the display order or alignment/distribution of text boxes. The cut or copied text box can be pasted from the menu displayed by control-clicking the page.

