Edit Custom Paper Dialog Box
You can edit the media information for custom paper in the Edit Custom Paper dialog box.
 Important
-
Edit the custom paper in the Edit Custom Paper dialog box in the order shown below.
If you do not follow this order, you may need to configure the settings again.
-
Paper Feed Adjustment sheet
-
Advanced Print Settings sheet
-
Advanced Paper Settings sheet
-
Calibration Target sheet
-
ICC Profile sheet
-
-
Always perform paper feed adjustment. Set other items as needed.
-
Depending on your model, the Calibration Target sheet may not appear.
-
After setting the Calibration Target and ICC Profile sheets, changes to the ink usage on the Advanced Paper Settings sheet will disable the settings on the Calibration Target and ICC Profile sheets. In this case, set the Calibration Target and ICC Profile sheets again.
-
After you have selected the settings, always click the Update button.
-
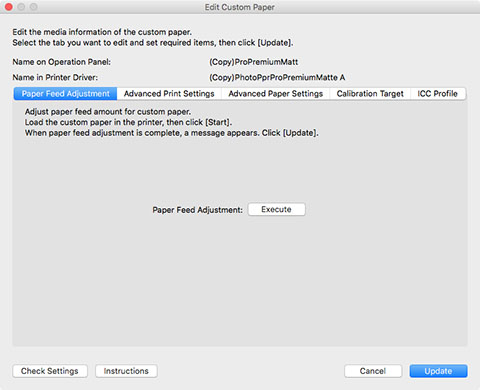
Paper Feed Adjustment sheet
 Important
-
If Paper Feed Adjustment is not executed, horizontal stripes with different color tones may appear in the printed material. Execute paper feed adjustment each time you add a custom paper. This does not need to be executed for each paper source.
-
Click the Execute button.
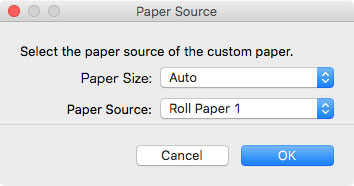
The Paper Source dialog box appears.
-
Select the paper size of the custom paper and paper source where the custom paper is loaded.
 Important
-
The paper sources that can be loaded vary depending on the custom paper.
-
-
Load the custom paper in the paper source you selected.
 Important
-
Do not load paper that is curled or that has already been printed on.
-
-
Select the custom paper set on the printer control panel.
-
Click the OK button.
 Note
Note-
Paper feed adjustment takes approximately 10 minutes to complete.
The adjustment pattern is printed, and the paper feed is automatically adjusted based on the printing result.
 Important
-
Check that there is no paper left on the ejection guide.
-
-
-
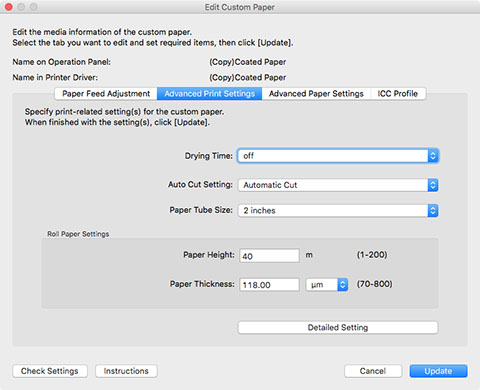
Advanced Print Settings sheet
 Important
-
Depending on your model, some settings may not appear.
- Drying Time
-
Specify the time that the printer waits for ink to dry. For paper where the ink does not dry well, specify the drying time.
-
- Off
-
- For roll paper
-
Ejects immediately after printing finishes.
- For cut paper
-
Soon after printing finishes, the next page will start to print.
- Drying time
-
- For roll paper
-
Ejects after the specified time has elapsed after printing finishes.
- For cut paper
-
The next page will start to print after the specified time has elapsed after the previous printing.
-
 Note
Note-
Drying time applies only to roll paper on models that support roll paper. This does not apply to cut paper.
-
- Auto Cut Setting
-
Configures the method for cutting roll paper when it is ejected after printing.
-
- Automatic Cut
-
Roll paper is automatically cut by the cutter unit.
- Eject Cut
-
When the printer touchscreen is operated, the roll paper is cut by the cutter unit. Select this option if you do not want the printed material to drop immediately after printing, for example, in order to wait for the ink to dry.
- User Cut
-
Cutting is not performed by the cutter unit. Cut the roll paper using scissors after each sheet. Select this for paper that cannot be cut by the cutter unit.
-
 Important
-
Depending on the paper, there are types that cannot be cut by the cutter unit, and types that speed deterioration of the blade and cause damage to the cutter. For thick paper and hard paper, do not use the cutter unit, and instead cut the roll paper using scissors after printing.
In this case, set Auto Cut Setting to User Cut on the Advanced Print Settings sheet in the Edit Custom Paper dialog box.
-
- Paper Tube Size
-
Select the paper tube size of the roll paper loaded when printing.
- Roll Paper Settings
-
- Paper Height
-
Enter the length of the roll paper that has been loaded for printing.
- Paper Thickness
-
Enter the thickness of the roll paper that has been loaded for printing.
The units for the roll paper's thickness can be changed.
- Detailed Setting button
-
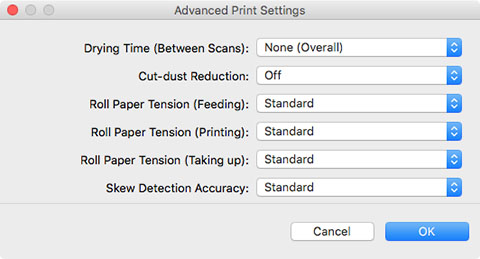
The Advanced Print Settings dialog box appears.
-
-
- Drying Time (Between Scans)
-
When the time is set, after printing one line, the printer waits for the set time to elapse before printing the next line.
-
Set this option when color bleeding appears on the page.
-
- None (Overall)
-
After one line is printed, the next line is immediately printed.
- Drying time (Overall)
-
A drying interval is added for each line from printing start to end.
- Drying time (leading edge only)
-
A drying interval is added for each line at the edge of the paper.
-
 Note
Note-
A band of uneven color may appear on the border between the areas with and without drying time.
-
- Cut-dust Reduction
-
Selecting On applies ink at the cutting position when cutting paper and reduces the scattering of cut waste.
-
Also, on paper with paste, it makes it difficult for the paste to adhere to the cutter and prevents deterioration of cutter cutting performance.
- Roll Paper Tension (Feeding)
-
Select the slack of roll paper at feeding.
- Roll Paper Tension (Printing)
-
Select the slack of roll paper at printing.
- Roll Paper Tension (Taking up)
-
Select the slack of roll paper at winding.
- Skew Detection Accuracy
-
For paper without a fixed width, select Loose to lower the precision of the paper skew detection function or select Off to disable the skew detection function.
-
However, if Off is selected and the paper skew is set, a paper jam can occur, and the platen can become dirty.
-
-
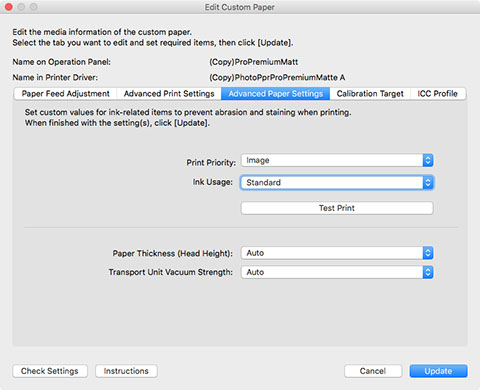
Advanced Paper Settings sheet
 Important
-
Depending on your model, some settings may not appear.
- Print Priority
-
The print priority you select in the printer driver will appear here.
- Ink Usage
-
Selects and sets the upper limit on the amount of ink to use when printing on customer paper from among several levels.
-
For details on setting the ink level, see "Setting Ink Level."
-
 Important
-
After setting the Calibration Target and ICC Profile sheets, changes to the ink usage on the Advanced Paper Settings sheet will disable the settings on the Calibration Target and ICC Profile sheets. In this case, set the Calibration Target and ICC Profile sheets again.
-
If you change the ink usage level, the type of black ink that will be used may change.
-
- Paper Thickness (Head Height)
-
Sets the height of the printhead. Set this higher if the printhead is rubbing against the paper.
-
- Auto
-
Automatically sets the height of the printhead to match the selected base paper depending on the environment and printing mode.
- Setting Height
-
The higher the level, the more distance between the printhead and the paper.
-
 Important
-
If you set Paper Thickness (Head Height) too low, the printhead might rub against the paper. If the printhead rubs against the paper, there will be scratches in the printing results and the printhead may be damaged.
-
- Transport Unit Vacuum Strength
-
Sets the vacuum strength for paper on the platen. If the printhead is rubbing against the paper, this may be fixed by increasing the strength of the vacuum. If the edges of images are washed out, this may be fixed by decreasing the strength of the vacuum.
-
- Auto
-
Automatically sets the vacuum strength that matches the selected base paper.
- Weak/Medium-weak/Standard/Medium-strong/Strong
-
You can select from among five available levels.
-
 Note
Note-
If the paper thickness is 0.004 inch (0.1 mm) or less, it is recommended that Transport Unit Vacuum Strength be set to Weak.
-
-
 Important
-
If changes are made to the Transport Unit Vacuum Strength, check that there is no rubbing against the paper. (If the printhead rubs against the paper, there will be scratches in the print results.) If the printhead rubs against the paper, the printhead may be damaged.
-
-
-
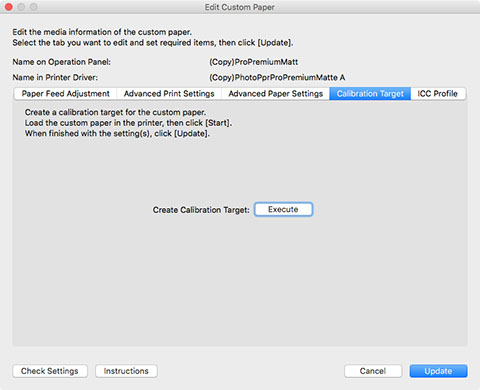
Calibration Target sheet
 Important
-
Depending on your model, this sheet will not appear.
 Note
Note-
If the Calibration Target of the selected base paper was set to Not creatable in the Create Custom Paper dialog box when the custom paper was added, the calibration target cannot be created.
-
Calibration can be performed for custom paper if a calibration target has been created.
-
Click the Execute button.
The Paper Source dialog box appears.
-
Select the paper size of the custom paper and paper source where the custom paper is loaded.

 Important
-
The paper sources that can be loaded vary depending on the custom paper.
-
If you are using a PRO-1000 or PRO-500 model, only the Top Feed can be used as the paper source for color calibration.
-
-
Load the custom paper in the paper source you selected.
 Important
-
Do not load paper that is curled or that has already been printed on.
-
If a paper source cannot be selected, load the paper into the paper source that is displayed in Paper Source.
-
-
Select the custom paper set on the printer control panel.
-
Click the OK button.
 Note
Note-
It takes approximately 15 minutes until the calibration target is created.
The calibration target is created for the loaded custom paper.
-
-
-
ICC Profile sheet
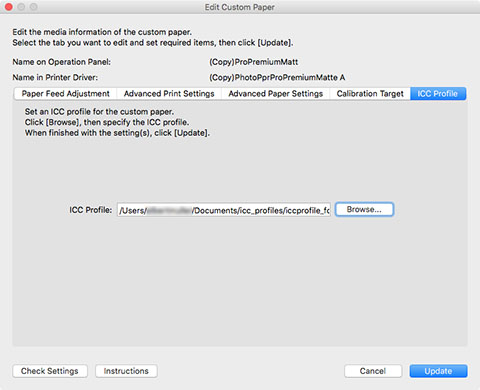
If a suitable ICC profile has been provided for the custom paper to be edited, click the Browse button, and select the ICC profile.
 Important
-
Only the RGB print profile can be selected for the ICC profile.
Depending on the file size, you may not be able to use the profile.
-
Alphanumeric characters, spaces, "-", "_", "(", and ")" can be used in ICC profile file names.
For ICC profile file names, up to 54 single-byte characters can be entered including the extension.
-
Setting Ink Level
Use the following procedure to test printing at each level, and then determine and set the optimal level from those results.
-
Click the Test Print button.

The Paper Source dialog box appears.
-
Select the paper size of the custom paper and paper source where the custom paper is loaded.

 Important
-
The paper sources that can be loaded vary depending on the custom paper.
-
-
Load the custom paper in the paper source you selected.
 Important
-
Do not load paper that is curled or that has already been printed on.
-
-
Select the custom paper set on the printer control panel.
-
Click the OK button.
The Test Print Settings dialog box appears.
-
Configure the print settings, and then click the Start Printing button.
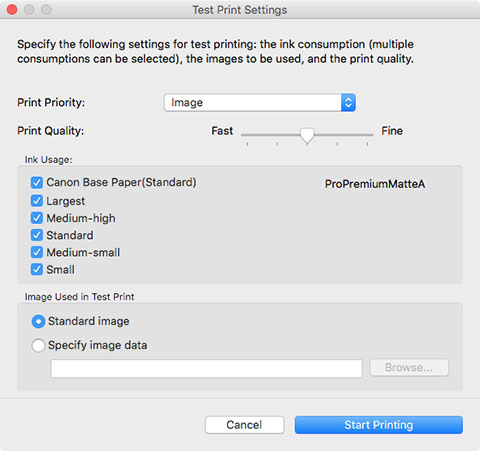
- Print Priority
-
The Image will appear.
- Print Quality
-
Selects the print quality that is expected to be used frequently when printing on the custom paper being added. The test print is performed using the selected setting.
-
 Note
Note-
Depending on the base paper, some print quality settings may not be available.
-
- Ink Usage
-
Select the ink usage level for test printing. Canon Base Paper is the ink usage for paper selected as the basis for the custom paper.
- Image Used in Test Print
-
Sets the image to use in test prints.
-
 Note
Note-
To use an image other than the standard image, use an uncompressed TIFF file where each RGB color is 8 bits.
-
Images that are larger than the paper size may be printed with the image cropped.
-
The maximum image size that can be used for test printing is 4 GB.
-
-
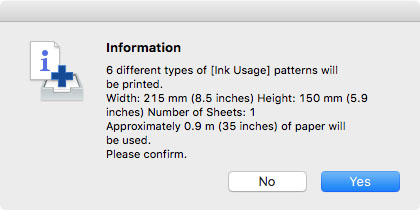
Click the Yes button.
-
Click the OK button.
-
Select Ink Usage in the Advanced Paper Settings sheet.

Determines and sets the ink level that is expected to produce no bleeding or grazing of ink and produce the best test print results when viewed.
 Important
-
After setting the Calibration Target and ICC Profile sheets, changes to the ink usage on the Advanced Paper Settings sheet will disable the settings on the Calibration Target and ICC Profile sheets. In this case, set the Calibration Target and ICC Profile sheets again.
-
If you change the ink usage level, the type of black ink that will be used may change.
If you performed the test print using the standard image, focus on the following to determine the optimal ink level.

-
Focus on the smoothness of color production and gradation, and check there is no roughness or loss of color.
-
Focus on whether text has not bleeding and is not broken or difficult to read.
-
Focus on whether there is no bleeding at the boundary between different colors, and that there is no color variation in each color.
 Note
Note-
Increasing the ink usage can widen the color area, and decreasing the ink usage can reduce ink bleeding and color collapse.
-
Depending on the paper, the printing results may not change regardless of the ink usage level. If you have trouble determining the level, we recommend selecting the Canon base paper.
-
Although the color tone may change when the ink usage is changed, at this point you should select the optimal level by only focusing on bleeding and scraping of ink. If the color tone needs to be adjusted, provide an ICC profile that matches the paper you are using, and select that ICC profile on the ICC Profile sheet.
-
Because this settings imposes an upper limit on the amount of ink used during printing, the printing result might not change even if the level is changed depending on the image.
-
-

