

Before you can use the coded speed dialing feature, you need to register the recipients' fax/telephone numbers. Follow the procedure below to register the recipients' fax/telephone numbers.
Make sure that the machine is turned on.
Press the FAX button.
The Fax standby screen is displayed.
Press the left Function button.
The Fax menu screen is displayed.
Select  TEL number registration, then press the OK button.
Use the 
 button to select Coded speed dial, then press the OK button.
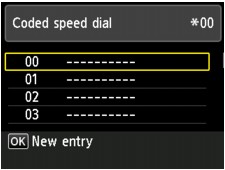
The screen to select a coded speed dial code is displayed.
 Note
NoteIf you select a code already used as a coded speed dial, the fax/telephone number is displayed next to the code. If you select a code already used as a group dial, (Not available) is displayed.
Use the 


 button or the Numeric buttons to select an unoccupied coded speed dial code, then press the OK button.
Use the 
 button to select a registration method, then press the OK button.
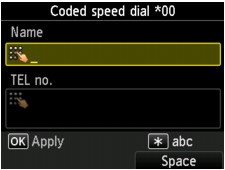
Direct entry
The screen to register the recipient's fax/telephone number and name is displayed. Go to next step.
From outgoing call log
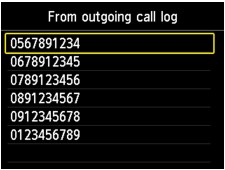
When you select this registration method, the screen to select the fax/telephone number from the outgoing call logs is displayed.
Using the 
 button to select a fax/telephone number and pressing the OK button, the screen to register the recipient's fax/telephone number and name is displayed. Go to next step.
From incoming call log
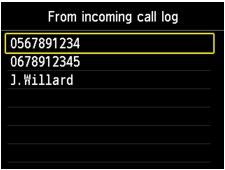
When you select this registration method, the screen to select the fax/telephone number or the name from the incoming call logs is displayed.
Using the 
 button to select a fax/telephone number or name and pressing the OK button, the screen to register the recipient's fax/telephone number and name is displayed. Go to next step.
 Note
NoteThis registration method may not be available depending on the country or region of purchase.
Enter the recipient's name.
If you select a name on From incoming call log in step 7, the name may be already entered. If you do not change the name, go to step 9.
Use the 
 button to move the cursor to Name.
Enter the recipient's name.
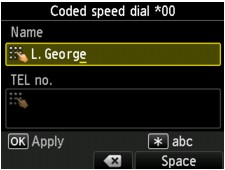
 Note
NoteYou can enter the name up to 16 characters, including spaces.
For details on how to enter or delete characters:
Enter the recipient's fax/telephone number.
If you select a fax/telephone number on From outgoing call log or From incoming call log, the fax/telephone number is already entered. If you do not change the fax/telephone number, go to next step.
Use the 
 button to move the cursor to TEL no..
Enter the recipient's fax/telephone number.
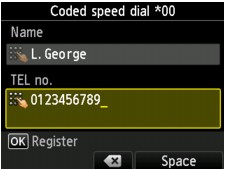
 Note
NoteYou can enter the fax/telephone number up to 60 digits (40 digits for the US, Canada, Korea and some regions of Latin America), including spaces.
For details on how to enter or delete characters:
When Telephone line type in FAX user settings under FAX settings is set to Rotary pulse, you can enter a tone ("T") by pressing the Tone button.
Press the OK button to finalize registration.
 Note
NoteTo register another recipient's number and name to a coded memory dial, select an unoccupied coded memory dial code and operate in the same procedure when you register.
You can check the recipient's numbers and names you have registered by printing CODED SPEED DIAL TELEPHONE NO. LIST.
Page top |