
Forwarding Scanned Data to Shared Folder on the Computer Using the Operation Panel of the Machine
Before forwarding scanned data on the shared folder on the computer, confirm the following:
-
The scanner driver and Canon Quick Toolbox are installed.
If the scanner driver and Canon Quick Toolbox are not yet installed, install them from our website.
-
The machine is connected to a computer via a LAN correctly.
-
The destination folder is specified in Canon Quick Toolbox.
You can specify the destination folder in Canon Quick Toolbox. For details on settings of Canon Quick Toolbox:
Follow the procedure below to forward scanned data to the shared folder on the computer.
-
Flick the HOME screen, then tap
 Scan.
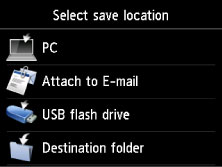
Scan.The screen for selecting to which you save the data is displayed.
-
Tap
 Destination folder.
 Note
Note-
When the message informing you that the operation restriction is enabled, ask the administrator of the machine you are using.
For details on the operation restriction of the machine:
-
-
Tap the folder to save scanned data on the Select folder screen.
Note-
When you specify a PIN code for a registered folder, a screen asking you to enter a PIN code is displayed. Entering the PIN code allows you to assign the shared folder as the destination.
-
-
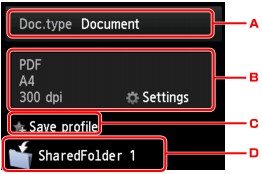
Specify the settings as necessary.
-
Tap to select the document type.
- Document
-
Scans the original on the platen glass or in the ADF as a document data applying the settings specified in Scan settings.
- Photo
-
Scans the original on the platen glass as a photo data applying the settings specified in Scan settings.
-
Tap to display Scan settings screen.
For details on the setting items:
 Setting Items for Scanning Using the Operation Panel of the Machine
 -
Tap to register the current scan settings as a custom setting.
-
Tap to display the screen to select the destination.
-
-
Load the original document on the platen glass or in the ADF.
-
Press the Color button for color scanning, or the Black button for black & white scanning.
Note-
If the original is not loaded properly, a message is displayed on the touch screen. Load the original on the platen glass or in the ADF according to the scan settings.
-
If you select ON for Preview on the scan setting screen:
The preview screen is displayed before forwarding the scanned original to the shared folder on the computer.
-
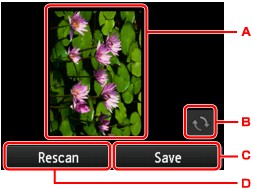
The preview screen of the scanning data is displayed.
-
Tap to rotate the preview screen.
Displayed when you select PDF or Compact PDF for Format on the scan setting screen.
-
Tap to forward the scanned original to the shared folder on the computer.
-
Tap to rescan the original.
-
-
If you load the original in the ADF:
The machine starts scanning and scanned data is forwarded to the shared folder of the computer.
-
If you load the original on the platen glass:
-
When you select JPEG for Format on the scan setting screen, the machine starts scanning and scanned data is saved on the shared folder of the computer.
-
When you select PDF or Compact PDF for Format on the scan setting screen, the confirmation screen asking you if you continue scanning is displayed after scanning is complete.
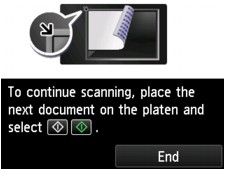
If you continue scanning, load the original on the platen glass and start scanning.
If you do not continue scanning, tap End. The scanned data is forwarded to the shared folder on the computer in one PDF file.
-
Scanned data is forwarded to the shared folder on the computer according to the settings specified in Canon Quick Toolbox.
Remove the original on the platen glass or from the document output slot after scanning is complete.
-
