
Printing Documents from Your Computer (Mac OS)
Print documents from applications on a computer or other device as follows.
-
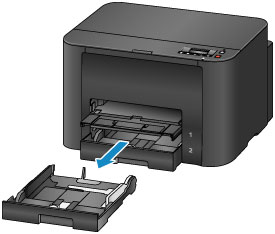
Pull out a cassette.
-
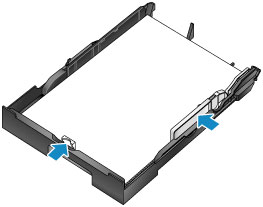
Load paper printing-side DOWN.
-
Align the paper guides with the paper length and width.
-
Insert the cassette.
After you insert the cassette, a screen for registering paper information for the cassette is displayed on the LCD.
-
Press the OK button.

-
Use the
 or
or  button to select the size of paper in the cassette, and then press the OK button.
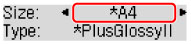
-
Use the
or button to select the type of paper in the cassette, and then press the OK button.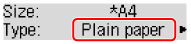
-
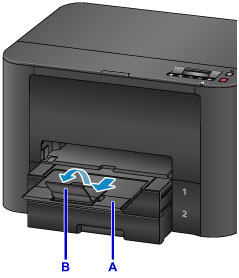
Pull out the output tray extension (A) and open the paper output support (B).
-
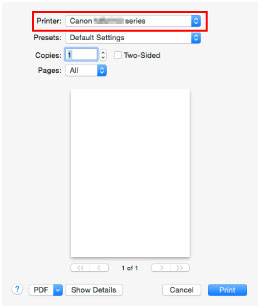
In the application, select Print.
You can often access the Print dialog by selecting Print... in the File menu.
 Note
Note- For detailed instructions on operation, refer to the application user manual.
-
Select the model name and click Printer list.
Click Show Details to switch the Setup window to the detailed display.
-
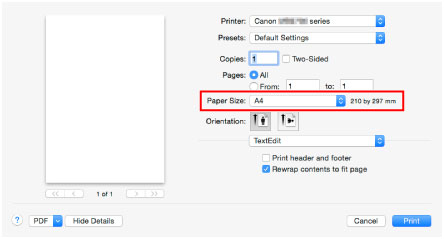
Select the paper size.
In Paper Size, select the paper size you use.
-
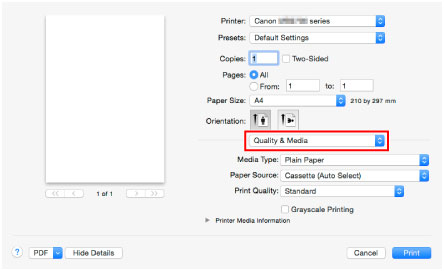
Select Quality & Media from the pop-up menu.
-
Select the media type.
In Media Type, select the same media type loaded in the printer.
-
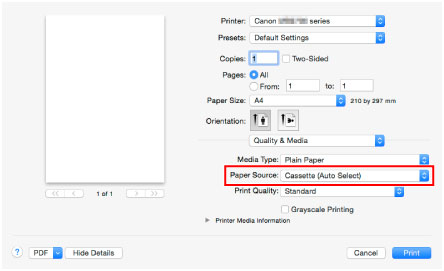
Select the paper source.
In Paper Source, select the cassette where the paper is loaded.
-
Once the print settings are complete, click Print to print.
![]() Note
Note
-
A variety of print settings can be configured with the printer driver.
