
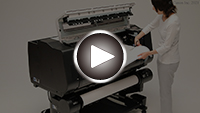
 Remove Jammed Roll Paper

If roll paper jams, follow the steps below to remove jams.
![]() Note
Note
- If "The paper is jammed. Lift the release lever and remove the paper." appears on the touch screen, Step 1 and Step 9 can be skipped.
-
Turn off the power to the printer.
-
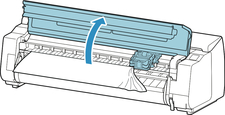
Open the top cover.
 Note
Note-
If the roll paper is very curled or the leading edge of the roll paper blocks the Carriage, setting the cutting method for the roll paper to User cut and leading edge detection to Do not detect may stop the paper from blocking the carriage.
-
-
If the Carriage is out, move the Carriage to the left or right side, away from the jammed paper.
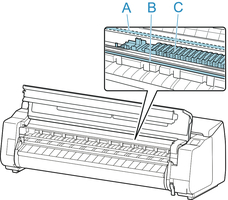
 Important
-
Do not touch the linear scale (A), carriage shaft (B), or ink tube stabilizer (C). Touching these may cause malfunction.
-
-
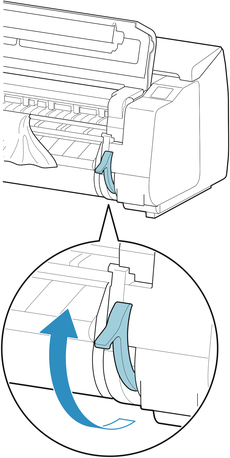
Lift up the release lever.
-
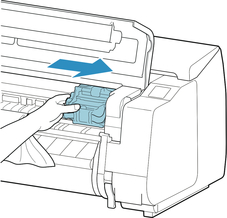
Holding the paper on both sides, pull the jammed portion out toward the front. Use scissors or a cutting tool to cut away the printed or wrinkled portion.
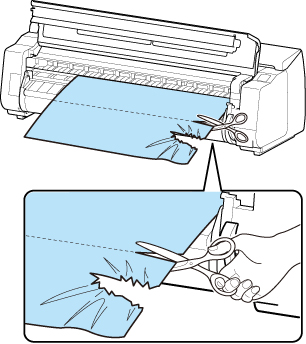
 Caution
- Be careful not to injure yourself or scratch the printer when cutting.
-
If the Carriage is on the left, move the Carriage to the right until it stops.
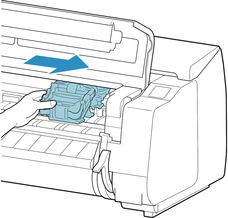 Important
- Always move the Carriage to the right side. If the Carriage is on the left, an error message may appear on the touch screen when you turn on the printer.
-
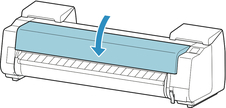
Hold the leading edge of the roll paper in the middle and pull it gently and evenly until it reaches the output guide (A) position. At this time, align the right edge of the roll paper parallel to the paper alignment line (B). When the paper is parallel to the line, lower the release lever.
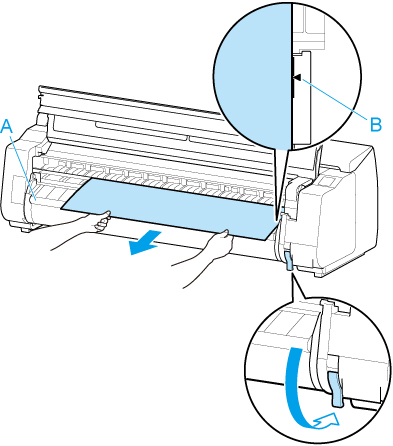 Important
- Align the roll paper with the paper alignment line (B) and make sure to keep the paper tension.
- Do not pull the roll paper forcefully. This might cause the roll paper to feed at an angle.
-
Close the top cover.
-
Turn on the power to the printer.
The roll is advanced and the printer is ready to print.
![]() Note
Note
-
To trim the leading edge cleanly, select the paper being fed on the touch screen, and then cut the leading edge by selecting Cut paper in Feed/cut.
