
Adjusting Line Misalignment
If printed lines are misaligned, execute Print head angle adjustment to adjust the print head angle. Print head angle adjustment requires you to examine a printed test pattern and adjust the angle using the angle adjustment lever.
Always adjust the print head angle after replacing the print head.
![]() Important
Important
- Because the results of adjustment vary depending on the type of paper used for adjustment, use the same type of paper as you will use for printing.
Paper to Prepare
- When using rolls
- An unused roll at least 10.00 in. (254.0 mm) wide
- When using sheets
- One sheet of unused paper of at least A4/Letter size
Perform adjustment as follows.
-
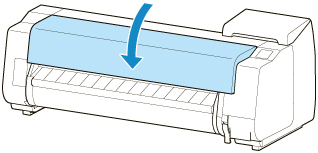
Load paper.
- Loading the Upper Roll on the Printer
- Loading the Lower Roll on the Roll Unit (Option)
- Loading Sheets in the Printer
 Important
- Always make sure the loaded paper matches the type of paper specified on the printer. Adjustment cannot be completed correctly unless the loaded paper matches the settings.
-
Tap Maintenance on HOME screen.
The Maintenance screen appears.
-
Tap Print head angle adjustment.
A confirmation message appears.
-
Tap Yes.
The carriage moves and instructions for the print head angle adjustment procedure appears on the touch screen.
-
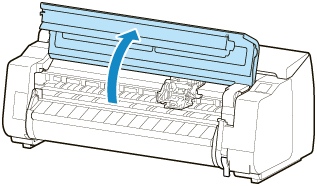
Open the top cover.
-
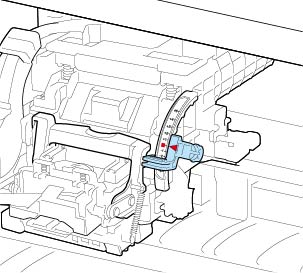
Align the angle adjustment lever with the red square and close the top cover.
A test pattern is printed for adjustment.
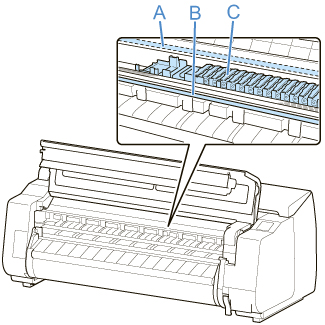
Important-
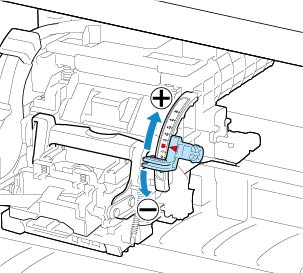
Do not touch the linear scale (A), carriage shaft (B), or ink tube stabilizer (C). Touching these may cause malfunction.
-
-
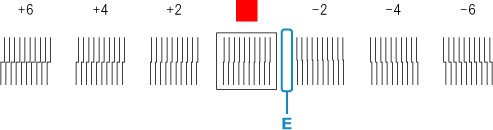
Examine the test pattern for adjustment. Determine the straightest set of lines.
Example 1: Select "+2" in pattern (D).
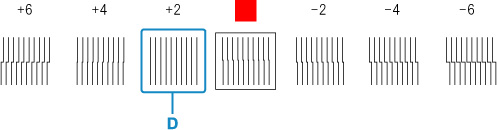
Example 2: Move the angle adjustment lever to a position between the numbers or between the number and the square (E) of the two sets of lines that are least misaligned. In this case, select -1.
-
Open top cover and move angle adjustment lever to match number (or square) of straightest set of lines.
-
Close the top cover.
The print head is now straight, and adjustment is complete.
![]() Note
Note
- If the problem, such as misaligned lines or color unevenness, is not solved after adjustment, execute Print head angle adjustment and move the angle adjustment lever in the front or the rear of the last position. When finished, execute Print Head Alignment again.
