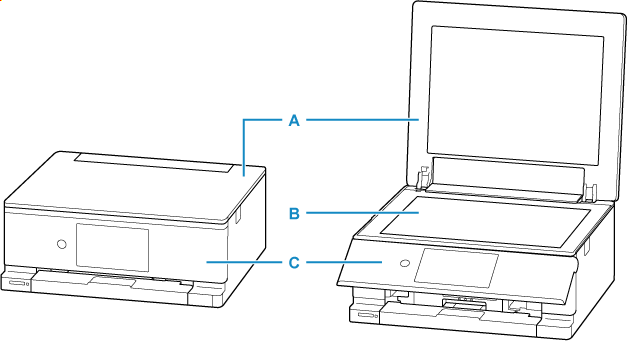
Front View

- A: Document Cover
- Open to load an original on the platen.
- B: Platen
- Place the original on the platen glass. When replacing ink tanks, lift the scanner unit that includes the platen glass to open.
- C: Operation Panel
-
Use to change the settings of the printer or to operate it. The panel is pushed open by the paper output tray before printing starts.
When closing, push gently toward the printer.

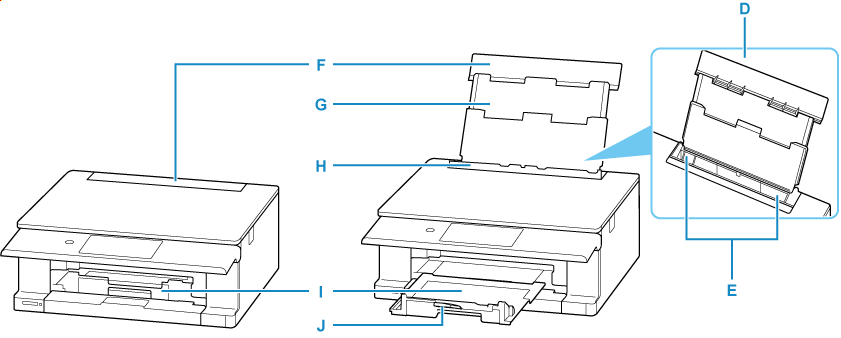
- D: Rear Tray
-
Two or more sheets of the same size and type of paper can be loaded at the same time, and fed automatically one sheet at a time.
- E: Paper Guides
- Align with both sides of the paper stack.
- F: Rear Tray Cover
- Open to load paper in the rear tray.
- G: Paper Support
- Extend to load paper in the rear tray.
- H: Feed Slot Cover
-
Prevents anything from falling into the feed slot.
Open it to slide the paper guides, and close it before printing.
- I: Paper Output Tray
- Printed paper is ejected. Pull out it before printing.
- J: Paper Output Support
- Open to support ejected paper.

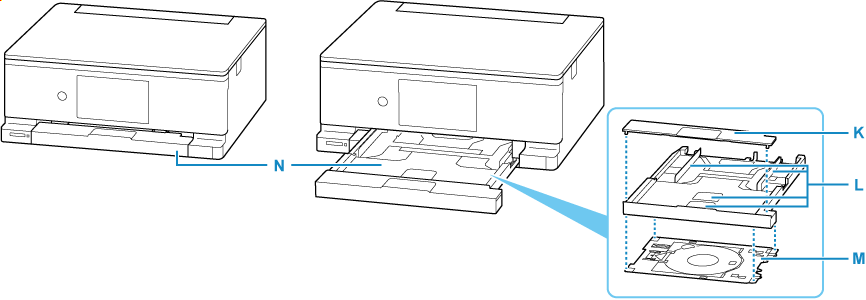
- K: Cassette Cover
- Detach to load paper in the cassette.
- L: Paper Guides
- Align with right/left/front sides of the paper stack.
- M: Multi-purpose Tray
-
Use when printing on printable discs, etc. Store behind the cassette when not using.
- N: Cassette
-
Load A4, B5 or A5 plain paper into the cassette, and insert it into the printer.

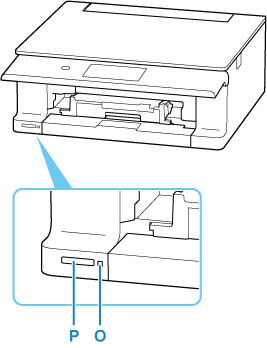
- O: Access lamp
-
Lights or flashes to indicate the memory card status.
- P: Card Slot
-
Insert a memory card.
