
Aligning the Print Head Manually
Try aligning the print head manually after automatic print head alignment if printing results are not as expected, as when printed ruled lines are misaligned.
![]() Note
Note
-
For details on automatic print head alignment, see Aligning the Print Head.
What you will need: three sheets of A4 or Letter-sized plain paper
-
Load three sheets of A4 or Letter-sized plain paper in cassette.
-
Select
 (Setup) on HOME screen.
The setup menu screen will appear.
-
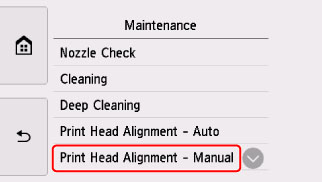
Select
 Maintenance.
The Maintenance screen will appear.
-
Select Print Head Alignment - Manual.
The confirmation screen will appear.
 Note
Note-
To print and check the current head position alignment values, select Print the head alignment value.
-
-
Check message and select Yes.
The operation panel is opened and the paper output tray is pulled out automatically.
The print head alignment pattern will be printed.
-
When Did the patterns print correctly? appears, make sure pattern was printed correctly, and if so, select Yes.
-
Check message and select Next.
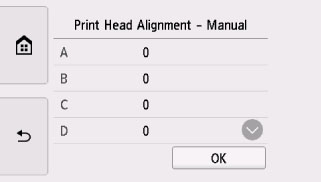
The input screen for head position alignment values is displayed.
-
Examine first patterns and tap A. In column A, find pattern in which streaks are least noticeable, and then select the number of that pattern.
 Note
Note-
If all patterns look different, choose the pattern in which vertical streaks are least noticeable.
Subtle vertical streaks

Noticeable vertical streaks

-
If all patterns look different, choose the pattern in which horizontal streaks are least noticeable.
Subtle horizontal streaks

Noticeable horizontal streaks

-
-
Repeat these steps until you have finished entering pattern numbers for columns B to H, and then select OK.
-
Check message and select OK.
The second set of patterns is printed.
-
Examine second patterns and tap I. In column I, find pattern in which streaks are least noticeable, and then select the number of that pattern.
 Note
Note-
If all patterns look different, choose the pattern in which vertical streaks are least noticeable.
Subtle vertical streaks
Noticeable vertical streaks
-
-
Repeat these steps until you have finished entering pattern numbers for columns J to P, and then select OK.
-
Check message and select OK.
The third set of patterns is printed.
-
Examine third patterns and tap a. In column a, find pattern in which stripes are least noticeable, and then select the number of that pattern.
 Note
Note-
If all patterns look different, choose the pattern in which horizontal stripes are least noticeable.
Subtle horizontal stripes

Noticeable horizontal stripes

-
-
Repeat these steps until you have finished entering pattern numbers for columns b to h, and then select OK.
-
When confirmation message appears, select OK.
