
Printing Photos from a Smartphone/Tablet
This section describes how to print photos with Canon PRINT Inkjet/SELPHY.
For details on how to download Canon PRINT Inkjet/SELPHY, see below.
-
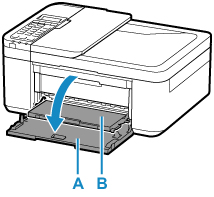
Open the front cover (A) gently.
The paper output tray (B) opens.
-
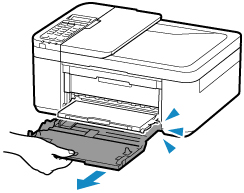
Pull out the cassette until it stops.
-
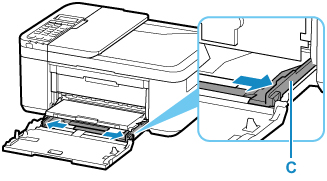
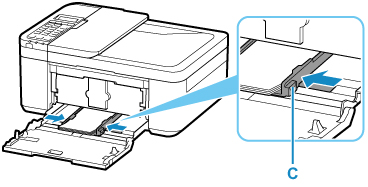
Use the right paper guide (C) to slide both paper guides all the way out.
-
Load photo paper in portrait orientation WITH PRINT SIDE FACING DOWN.
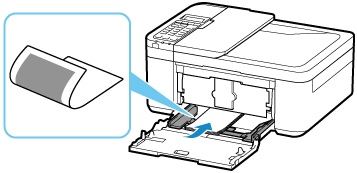
* The above figure shows the printer with the paper output tray raised.
-
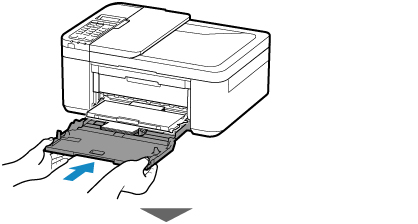
Slide the right paper guide (C) to align the paper guides with both sides of the paper stack.
* The above figure shows the printer with the paper output tray raised.
-
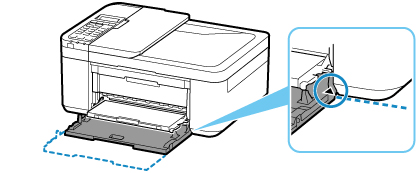
Push cassette back until arrow (
 ) on front cover is aligned with edge of printer.
After pushing the cassette back, the paper information registration screen for the cassette is displayed on the LCD.
-
Press the OK button.

-
Use the

 button to select the size of the loaded paper in the cassette, then press the OK button.
 Note
Note-
The
 (asterisk) on the LCD indicates the current setting.
-
-
Use the
button to select the type of the loaded paper in the cassette, then press the OK button.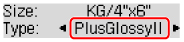
Follow the instructions of any messages displayed to register the paper information.
-
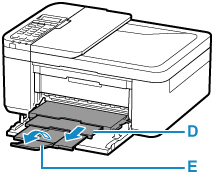
Pull the paper output support (D) out from the paper output tray.
-
Open the output tray extension (E).
-
Start
 (Canon PRINT Inkjet/SELPHY) from your smartphone/tablet.
 -
Select Photo Print on Canon PRINT Inkjet/SELPHY.
The list of photos saved on your smartphone/tablet is displayed.
-
Select a photo.
You can also select multiple photos at once.
-
Specify the number of copies, paper size, etc.
-
Select Print.
