
Printing Photos from a Computer
This section describes how to print photos with Easy-PhotoPrint Editor.
-
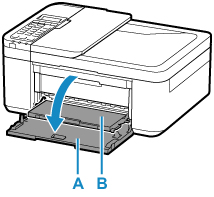
Open the front cover (A) gently.
The paper output tray (B) opens.
-
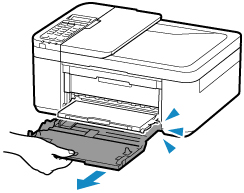
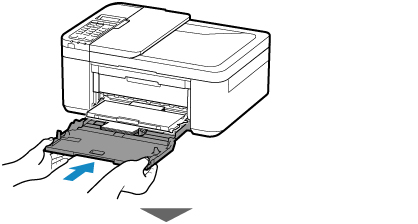
Pull out the cassette until it stops.
-
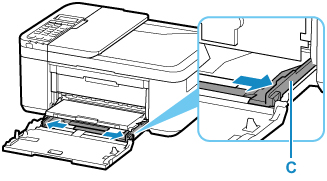
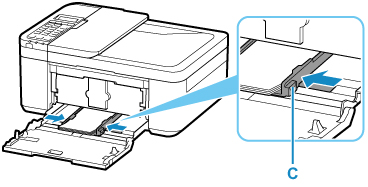
Use the right paper guide (C) to slide both paper guides all the way out.
-
Load photo paper in portrait orientation WITH PRINT SIDE FACING DOWN.
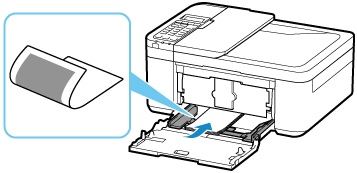
* The above figure shows the printer with the paper output tray raised.
-
Slide the right paper guide (C) to align the paper guides with both sides of the paper stack.
* The above figure shows the printer with the paper output tray raised.
-
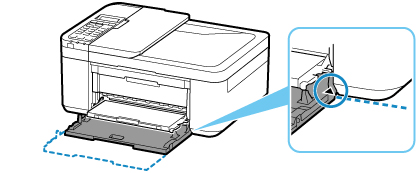
Push cassette back until arrow (
 ) on front cover is aligned with edge of printer.
After pushing the cassette back, the paper information registration screen for the cassette is displayed on the LCD.
-
Press the OK button.

-
Use the

 button to select the size of the loaded paper in the cassette, then press the OK button.
 Note
Note-
The
 (asterisk) on the LCD indicates the current setting.
-
-
Use the
button to select the type of the loaded paper in the cassette, then press the OK button.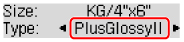
Follow the instructions of any messages displayed to register the paper information.
-
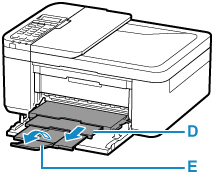
Pull the paper output support (D) out from the paper output tray.
-
Open the output tray extension (E).
-
Start Easy-PhotoPrint Editor.
For Windows:
The procedure below is for a computer running the Windows 10 operating system.
From the Start menu, select (All apps >) Canon Utilities > Easy-PhotoPrint Editor.
For macOS:
From the Go menu in Finder, select Application and double-click the Canon Utilities folder, the Easy-PhotoPrint Editor folder, and then the Easy-PhotoPrint Editor icon.
-
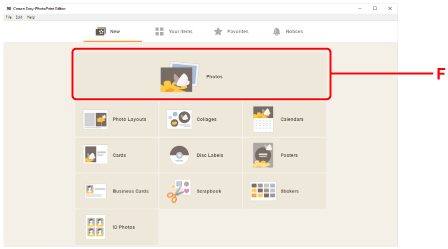
Click Photos icon (F).
-
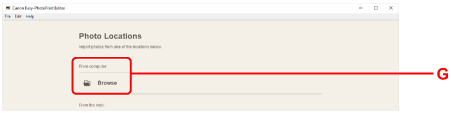
Click Browse (G) in From computer: and select folder with photos you want to print.
-
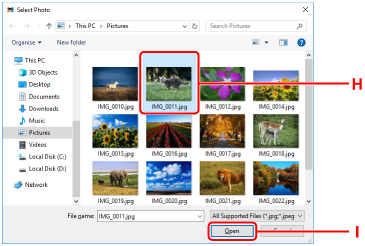
Click photos (H) you want to print and select Open (I).
For Windows:
To select two or more photos at a time, click photos while pressing the Ctrl key.
For macOS:
To select two or more photos at a time, click photos while pressing the command key.
-
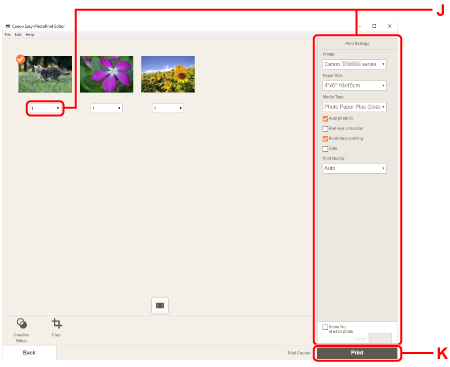
Specify number of copies and other options under Print Settings (J).
For Windows:
Specify the number of copies, your model name, the paper size, and other options.
For macOS:
Specify the number of copies, the paper size, and other options.
Note-
Selecting Same No. of each photo enables you to specify the number of copies for all photos with a single setting.
-
Selecting Same No. of each photo disables the number-of-copies setting specified for each photo. When unchecked, the previous settings for each copy are re-enabled.
 for specifying the number of copies is also re-enabled.
-
-
Start printing.
For Windows:
Click Print (K).
For macOS:
Click Next. When the Print dialog appears, specify your model name, paper, and other options, and then click Print.
![]() Note
Note
-
Easy-PhotoPrint Editor lets you easily create and print original collages, cards, or calendars using your favorite photos.
