
Using the Basket
This section describes how to use the basket.
![]() Note
Note
-
There are 2 types of stands that can be used with this printer: printer stand SD-32 and printer stand SD-31.
-
The explanation for the stand uses the illustrations for printer stand SD-32. Note that the illustrations may differ from the type you are using.
-
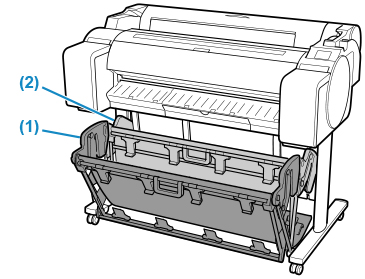
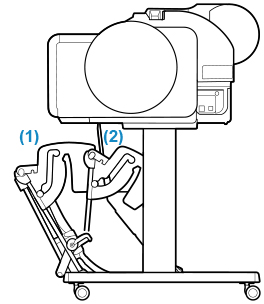
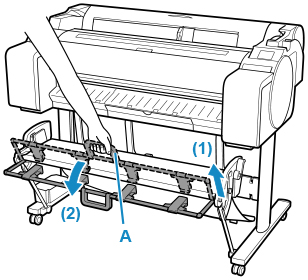
When storing printed documents on the basket
Use position (1). For details on how to use the Extended position which is a useful function for retrieving printed matter, refer to the note regarding the Extended position. (See "Convenient basket usage.")
-
When the basket is not used, when loading paper, or when moving the printer
Use position (2).
When moving the printer, always lift the Support Rod to Extended position A before putting it in position (2), otherwise the basket may touch the floor and be soiled or damaged. (See "Switching to Extended position A.")
![]() Important
Important
-
When storing printed documents on the basket, always use it in position (1). If you do not, printed documents may not be dropped into the basket, and the printed surface may become soiled.
-
The number of sheets that can be collected in the basket is one. If printing multiple pages, print after removing each sheet.
-
The basket can hold printed documents from paper up to 48 inches (1219.2 mm) long.
-
If the cloth part of the basket becomes dirty, wipe off the dirt without washing. Washing it may affect the performance of the basket.
Convenient basket usage
When printing line drawings on plain paper, you can use the basket not only at the regular position but also at two kinds of extended positions convenient for catching printed material.
In these extended positions, the basket can collected up to approximately 20 sheets of printed material.
The paper sizes that can be used with these extended positions are shown in the table below. Use the best position that suits the paper size and orientation.
![]() Important
Important
-
Use the regular position in the following situations. If you print multiple sheets in the regular position, remove the printed material from the basket one sheet at a time.
- Paper other than plain paper
- Paper sizes not listed in the following table and printed material other than line drawings
- If the paper curls excessively due to the qualities of the paper or the usage environment
- If the paper curls excessively near the end of a roll of paper
Return the basket to the regular position after printing.
| Extended position |
Paper orientation |
SD-31 |
SD-32 |
|---|---|---|---|
A |
Portrait |
ARCH E 36”x48”(914x1219mm) ARCH D 24”x36”(610x914mm) A0 841x1189mm A1 594x841mm |
ARCH E 36”x48”(914x1219mm) ARCH D 24”x36”(610x914mm) A0 841x1189mm A1 594x841mm |
B |
Landscape |
Unsupported |
ARCH D 36”x24”(914x610mm) ARCH C 24”x18”(610x457mm) A1 841x594mm A2 594x420mm |
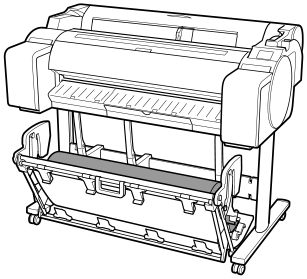
Regular position
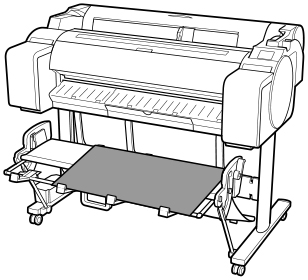
Extended position A

Extended position B (SD-32 only)
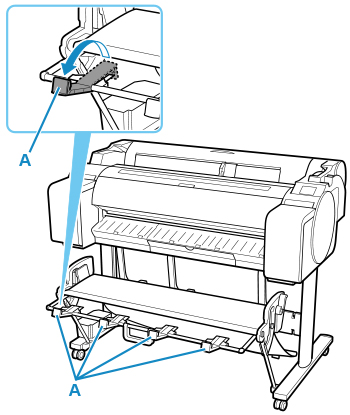
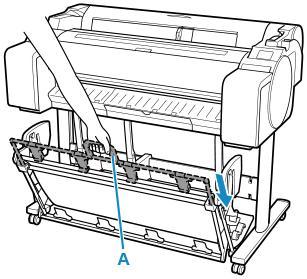
Switching to Extended position A
Switch the stacker to Extended position A as follows.
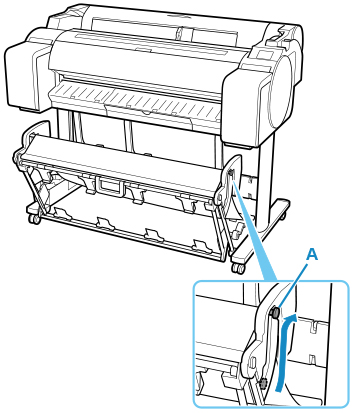
-
Lift the Support Rod to the position shown (A) and switch the stacker to Extended position A.
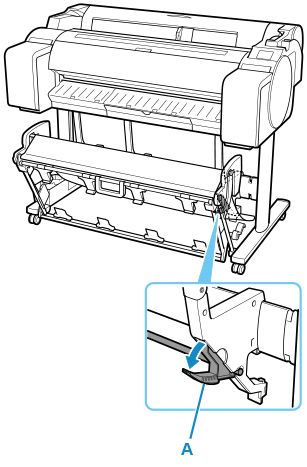
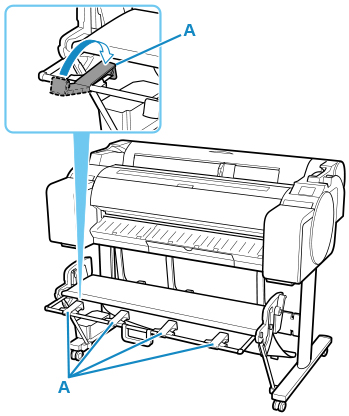
-
When using 24-inch or A1 (portrait) roll paper, pull out the Adjustable Stopper (A).
This completes the procedure for switching to Extended position A.
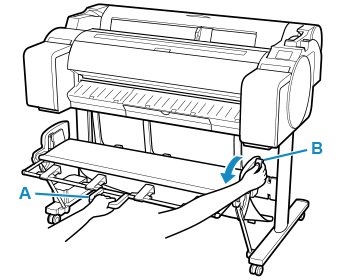
Once the printing has finished, use the following procedure to return to the regular position.
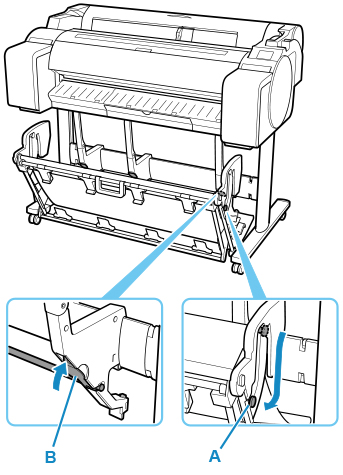
-
Lower the Support Rod to the position shown (A) to return to the regular position.
If the Adjustable Stopper (B) is extended, retract it.
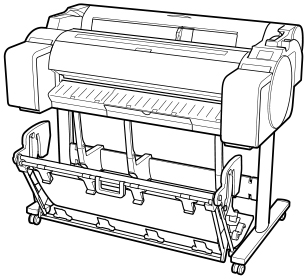
-
Return to the regular position.
-
Switching to Extended position B (SD-32 only)
Switch the stacker to Extended position B as follows.
-
Grasp the basket handle (A) and pull out the basket so that it tilts towards you.
-
Open the Basket Ejection Guides (A).
This completes the procedure of switching to Extended position B.
Once the printing has finished, use the following procedure to return to the regular position.
-
Push the Basket Ejection Guides (A) closed until it clicks into place.
-
Hold onto the basket handle (A) and pull the basket release lever (B) towards you.
-
While continuing to hold the basket handle (A), slowly lower the basket.
-
Return to the regular position.
