
Printing From a Desired Starting Point
Print on sheets from a desired starting point as follows.
Setting Detect paper width to Disable
-
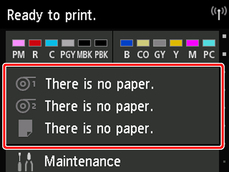
Tap paper settings display area on Home screen of touch screen.
 Note
Note-
If the Home screen does not appear, tap the Home button.
-
-
Tap
 area.
area. -
Tap Paper settings.
-
Tap Advanced.
-
Select Detect paper width and tap Disable.
Load paper in the desired position to start printing from
Follow these instructions to load paper at the desired starting position for printing when Detect paper width is set to Disable.
-
If you did not send a print job in advance, a menu for selection of the type of paper is displayed.
Tap media type loaded.
Note-
If a print job was received before the paper was fed, the media type and size specified by the job are shown on the touch screen.
Go to step 2.
-
-
When "[Detect paper width] is disabled. Do you want to keep it disabled and continue?" appears on touch screen, tap Keep it disabled and continue.
-
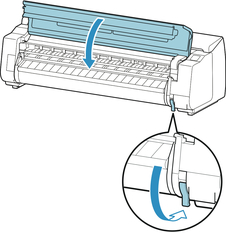
Open top cover and check position where paper is loaded.
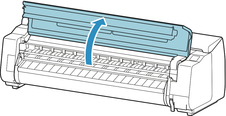
To start printing from the current position, close the top cover.
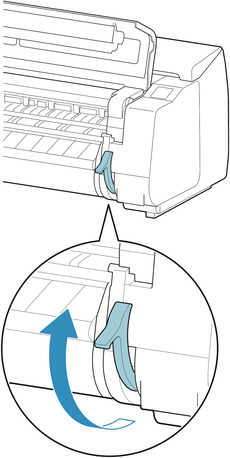
To reposition the paper, lift the release lever.
-
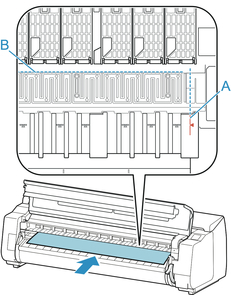
Load paper keeping right edge of paper aligned with extended line of paper alignment line (A) on right side of printer and position from which to start printing aligned with groove (B) at far end of platen.
-
Lower release lever and close top cover.
-
When screen for selecting paper size appears, select size of paper loaded.
