Using the Basket
By changing the following four items for the basket, you can use the basket in various ways to suit your application.
-
Length of basket arm
-
Tilt of basket arm
-
Attachment position of basket
-
Length of basket
This section describes how to change the basket.
For specific examples of basket use, see "Example Basket Configurations."
 Important
-
When changing the position of the basket, first return the basket to a unwound state while pressing the basket rewind button on the right end of the basket rod (tag side), and then make the change.
-
If the basket rod (tag side) has come off the basket arm, attach it by inserting the projections on both ends of the basket rod (tag side) into oval holes on the tip of the basket arm.
-
When moving the printer, remove the basket.
-
Do not apply excessive force to the basket. Doing so may damage the basket.
-
If the cloth part of the basket becomes dirty, wipe off the dirt without washing. Washing it may affect the performance of the basket.
Changing Length of basket arm
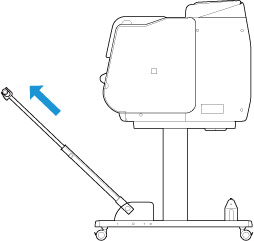
You can change the length of the basket arm in two steps.
To lengthen, expand the left/right basket arm in the direction of the arrow.
To shorten, contract the left/right basket arm in the opposite direction of the arrow.
 Important
-
When lengthening the basket arm, first return the basket to an unwound state while pressing the basket rewind button on the right edge of the basket rod (tag side), and then make the change.
Changing Tilt of basket arm
You can change the tilt of the basket arm in three steps.
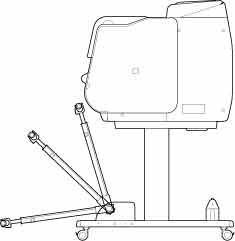
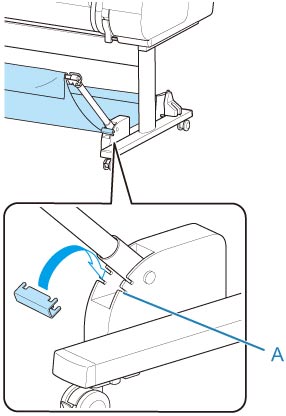
When securing the basket arm, attach the basket locking support to the basket arms (A) on both sides.
 Important
-
If you are changing the angle of the basket arm, make sure the thick part of the basket arm is pulled out as far as possible.
-
When changing the angle of the basket arm, hold the thick part of the left/right basket arm, and adjust them.
-
While using the basket locking support, do not apply excessive force to the orientation in which you lower the basket arm. Doing so may damage the basket.
-
While using the basket locking support, you cannot use "Printing on Large-Format or Easily Damaged Paper (Position 3)." When using this position, detach the basket locking support.
-
While using the basket locking support, you cannot store the basket. When you store the basket, detach the basket locking support.
Changing Attachment Position of basket
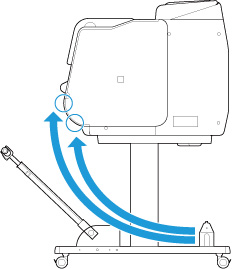
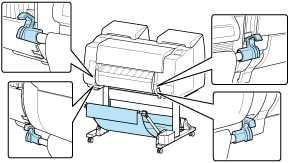
You can attach the basket rod (cord side) to the stand's rod holder or the front of the printer.
To attach, hang both sides of the basket rod (cord side) on the paired attachment locations shown in the illustration.
 Important
-
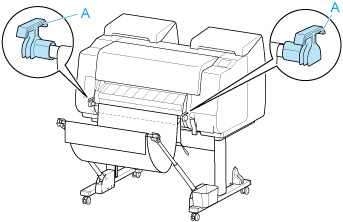
When attaching the basket rod (cord side) to the front of the printer, make sure both ends of the rod (A) are securely hooked onto the attachment parts.
Changing Length of basket
You can adjust the basket length by rotating the basket rod (tag side).
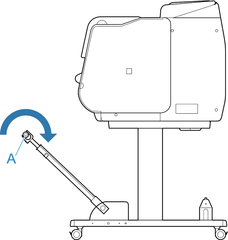
To shorten, rotate the basket rod (tag side) in the direction of the arrow to wind the basket.
To lengthen, rotate the basket rod (tag side) in the opposite direction of the arrow while pressing the basket rewind button (A) on the right end of the basket rod (tag side). You can return the wound basket to its original position.
