
 Printed Surface Is Smudged/Scratched/Ink Blots/Paper Curl/Paper Is Smudged During Automatic 2-sided Printing

-
Check 1 Check paper and print quality settings.
-
Check 2 Check paper type.
Make sure you are using the right paper for what you are printing. To print data with high color saturation such as photographs or images with dark colors, we recommend that you use Photo Paper Plus Glossy II or other Canon specialty paper.
-
Check 3 Correct curl before loading paper.
When using Photo Paper Plus Semi-gloss, even if the sheet is curled, load one sheet at a time as it is. Rolling this paper in the opposite direction to flatten it may crack the paper surface and reduce the print quality.
We recommend putting unused paper back into the package and storing it flat.
-
Plain Paper:
Turn the paper over and reload it to print on the other side.
-
Other Paper such as envelope or Hagaki:
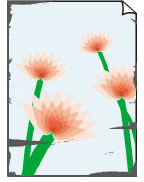
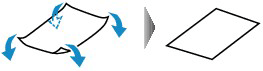
If the paper corners curl more than 0.1 in. / 3 mm (A) in height, the paper may smudge or may not feed properly. Follow the instructions below to correct the paper curl.

-
Roll up paper in opposite direction to paper curl as shown below.
-
Check that paper is now flat.
We recommend printing curl-corrected paper one sheet at a time.
-
 Note
Note-
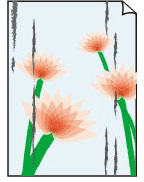
Depending on paper type, the paper may smudge or may not feed properly even if it is not curled inward. Follow the instructions below to curl the paper outward up to 0.1 in. / 3 mm (C) in height before printing. This may improve the print result.
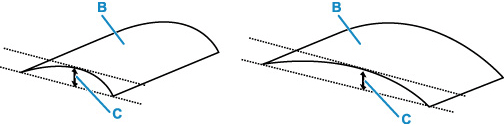
(B) Print side
We recommend feeding paper that has been curled outward one sheet at a time.
-
-
Check 4 Set printer to prevent paper abrasion.
Adjusting the setting to prevent paper abrasion will widen the clearance between the print head and the paper. If you notice abrasion even with the media type set correctly to match the paper, set the printer to prevent paper abrasion using the operation panel or the computer.
This may reduce the print speed.
* Once you have finished printing, undo this setting. Otherwise, it will apply to subsequent print jobs.
Press the Setup button once or twice to display the Setup menu, select Printer settings > Print settings, and set Prevent abrasion > ON.
-
Check 5 If ink bleeds, make sure that Improve bleeding and thickened black text/lines (plain paper) is checked. (Windows)
It may be possible to improve the bleeding of characters and lines when printing on Plain Paper.
Set it at Print Options dialog box on Page Setup sheet in the Printer Driver.
Restore the setting after printing.
-
Check 6 When using plain paper, please select Reduce ink smudges setting.
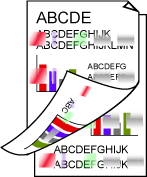
Depending on the paper characteristics of plain paper, ink is more unlikely to fix on paper. As a result, you may get ink on your fingers by touching the printed paper right after printing, or ink on the surface of paper may attach on the back side of it in two-sided printing mode. In such cases, please select Reduce ink smudges setting from the printer operation panel.
Press the Setup button once or twice to display the Setup menu, select Printer settings > Print settings in this order, and then select the level of Reduce ink smudges setting according to the smudge level.
Note- By applying this setting, printing speed may be slower, or printing quality may decrease.
-
Check 7 If brightness is set low, increase brightness setting and try printing again.
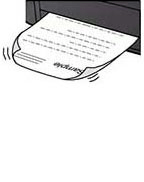
If you are printing with a low brightness setting on Plain Paper, the paper may absorb too much ink and become wavy, causing paper abrasion.
-
Printing from your computer (Windows)
Check the brightness setting in the Printer Driver.
-
-
Check 8 Is paper feed roller dirty?
Clean paper feed roller.
Note-
Cleaning the paper feed roller abrades it, so do this only when necessary.
-
-
Check 9 Is inside of printer dirty?
During 2-sided printing, ink may stain the inside of the printer, smudging the printout.
Perform bottom plate cleaning to clean inside of printer.
Note- To prevent staining inside the printer, be sure to set the correct paper size.
-
Check 10 Set longer ink drying time.
This allows the printed surface to dry, preventing smudges and scratches.
-
For Windows:
Set the waiting time using Remote UI.
-
Open Remote UI on the web browser of your device.
-
Select Log in on Remote UI.
-
Select Printer settings.
-
Select Ink drying wait time.
-
-
For macOS:
Set the waiting time using Remote UI.
-
