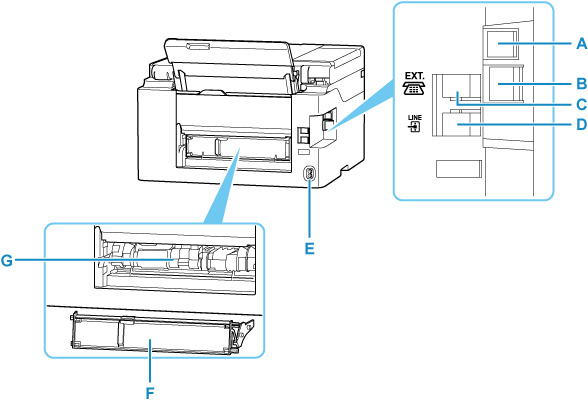
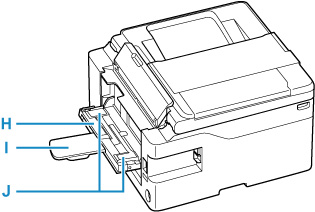
Rear View

- A: USB Port
- Plug in the USB cable to connect the printer with a computer.
- B: Wired LAN Connector
- Plug in the LAN cable to connect the printer to a LAN.
- C: External Device Jack
- Connect an external device such as telephone or answering device.
- D: Telephone Line Jack
- Connect the telephone line.
- E: Power Cord Connector
- Plug in the supplied power cord.
- F: Transport Unit Cover
- Detach when removing jammed paper.
- G: Transport Unit
- Open when removing jammed paper.

- H: Rear Flat Tray
- Load A4, B5, and letter-sized paperboard on this tray.
- I: Paper Support
- Pull out the rear flat tray toward you when loading paper on a rear flat tray.
- J: Paper Guides
- Align with both sides of the paper stack.
 Important
-
Do not touch the metal casing.
-
Do not plug in or unplug the USB cable or LAN cable while the printer is printing or scanning with the computer. This can cause trouble.

