
Check Installation of Print Head
Remove the print head and reinstall it properly following the steps below. This may resolve the error.
-
Press Setup button, use

 button to select Maintenance, and press OK button.
 -
Use
button to select Start replacement and then press OK button. -
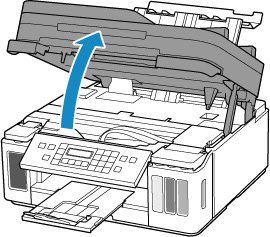
Open scanning unit / cover.
 Important
- If the inside of the printer and the head are dirty with ink, clean with a soft cloth that gets wet with water and squeezed firmly before working. Also, be careful not to attach ink to clothes, etc. by the removed head.
- Do not touch the metal part inside the printer and other parts.
-
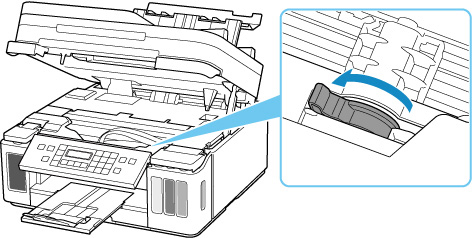
Close ink valve.
Tilt the ink valve lever tightly to the left.
-
Press OK button.
The print head holder moves.
 Caution
- Do not hold the print head holder by hand or move it forcibly while the print head holder is moving. Do not touch it until the print head holder stops moving.
Important- If you leave the scanning unit / cover open for more than 10 minutes, the print head holder may move and the Alarm lamp may light up. In that case, close the scanning unit / cover once and open it again.
-
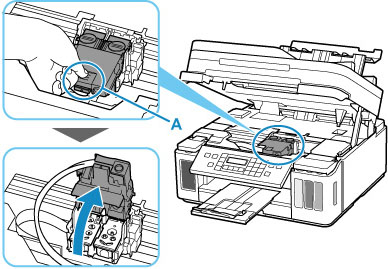
Grab knob (A) on print head locking cover to open it.
-
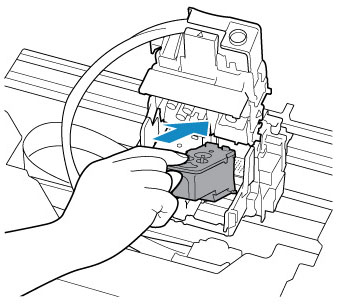
Remove color and black print heads.
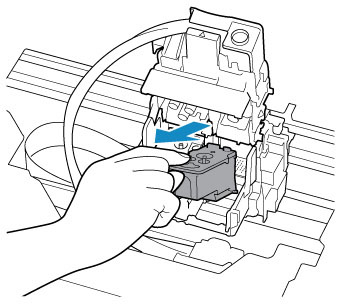
- When removing the print head, handle it carefully so that ink does not spatter.
- Do not touch the ink tube or other parts inside the printer. Touching these parts may cause the printer to malfunction.
-
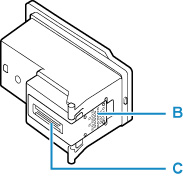
Do not touch the gold terminal (B) or print head nozzles (C) on a print head. The printer may not print properly if you touch them.
-
Reinstall print head properly.
Install the color print head in the left holder and the black print head in the right holder.
-
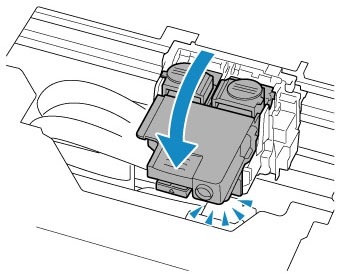
Close print head locking cover and push it down.
Press firmly the print head locking cover until it clicks into place.
-
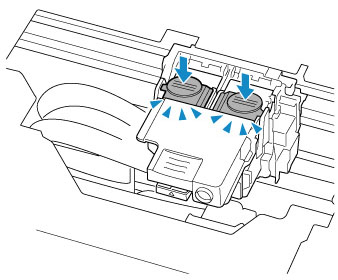
Press down both joint buttons.
 Important
- Push the joint button firmly until it clicks into place; otherwise, printing may become impossible.
- Make sure the left and right buttons are pushed in.
-
Open ink valve.
Tilt the ink valve lever tightly to the right.

-
Close scanning unit / cover.
Cleaning of the print head is started automatically.
Do not perform other operations until it ends.
-
Print the nozzle check pattern.
Print the nozzle check pattern to determine whether the ink ejects properly from the print head nozzles.
-
From the printer
-
From the computer
-
For Windows:
-
For macOS:
-
-
![]() Important
Important
If the nozzle check pattern is not printed correctly even after checking installation of print head, problems may be solved by replacing the print head.
For details, see here.
