Print as Three-Sided Borderless
Print with margins added only to the right side for each page.
In normal borderless printing, paper sizes that match the width of the roll paper are combined to print without borders on all four sides.
If you use the three-sided borderless printing feature, you can combine paper sizes that don't match the roll paper width, and print with no borders on three sides. However, if you perform three-sided borderless printing, you need to cut the right side of the paper after printing.
-
Open the file you want to print, and then start Free Layout plus.
To learn how to start it, see "Start Free Layout plus and Input Data."
-
Click Fixed Layout on the Home screen.
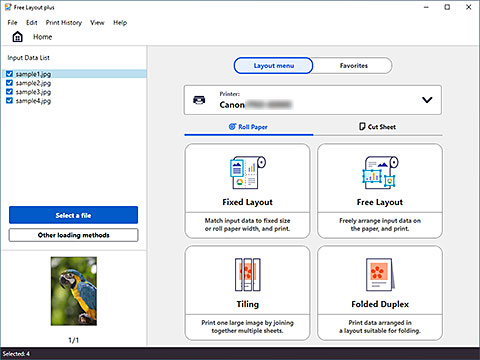
The page settings screen in Fixed Layout mode will appear.
-
Select On for Borderless Printing (or Minimal Margin Printing).
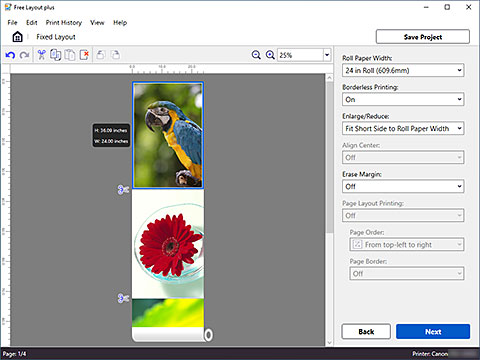
 Note
Note- In some models, Borderless Printing is labeled as Minimal Margin Printing instead. When labeled as Minimal Margin Printing, small margins will remain on the left and right sides during printing.
-
Set the size with Enlarge/Reduce, and then click Next.
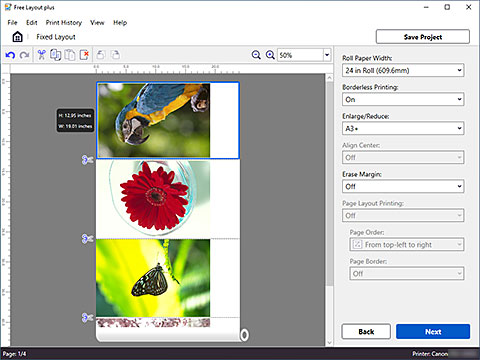 Note
Note- Fit Short Side to Roll Paper Width is set in initial settings.
- If the original size of all pages fit within the roll paper width, Match Page Size will also appear in the pulldown menu.
- If the document size and the paper size that you want to print are different, select the paper size you want to print from the pulldown menu.
-
Set the items related to printing, and then click Print.

Printing will start.
-
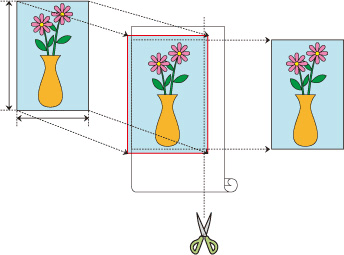
Cut the right side of the paper.
Cut the margin on the right side of the paper with scissors after printing.
To get the document to standard size, it is recommended to take measurements and cut in the correct positions.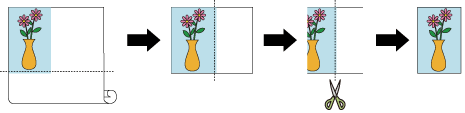
![]() Important
Important
- If Borderless Printing (or Minimal Margin Printing) is On, Align Center is grayed out, and can't be set.
