
Tiling Mode
Clicking Tiling on the home screen opens the Tiling mode.
In the Tiling mode, divide a single page of input data, and then print it. You can align the printouts and glue them together to create a larger printed image.

Menu Bar
This allows you to select menus required for operations.

Main Area
In this area, you can select and divide images, and make other print settings.
![]() Note
Note
- Click
 in the main area to return to the home screen.
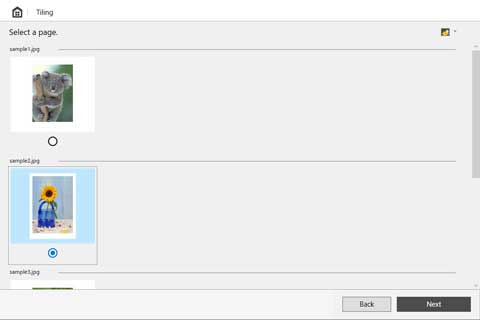
Page Selection Screen
Select the pages to print.
Clicking Next closes the selection process and moves you to the edit screen.
![]() Note
Note
- You can change the size of the thumbnails by clicking
 /
/ /
/ .
.
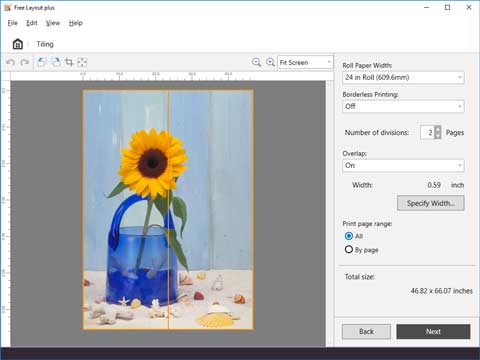
Edit Screen
Set the number of divisions and roll paper width as you check a preview of the print results.
Clicking Next closes editing and moves you to the print settings screen.
- Tool Bar
-
This allows you to select tool buttons required for major operations.

 Undo
Undo-
Reverses the last edit.
You can also perform Undo from the Edit menu.  Redo
Redo-
Restores the last edit.
You can also perform Redo from the Edit menu.  Rotate Left 90 Degrees
-
Rotates the selected object 90 degrees to the left.
 Rotate Right 90 Degrees
-
Rotates the selected object 90 degrees to the right.
 Crop
Crop-
Cuts the selected object within any range.
You cannot do other editing operations while cropping.  Erase Margin
-
Erases the margin of the selected object.
 (Enlarge/Reduce View)
-
Allows you to change the scaling ratio in the preview screen.
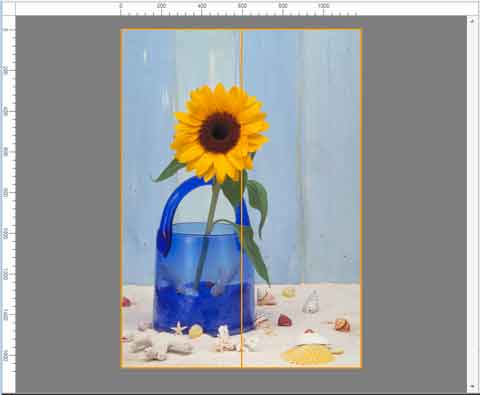
- Preview Area
-
Shows an image of the print results pasted together using the current settings.
- Edit Settings Area
-
Set the number of divisions and roll paper width, etc.
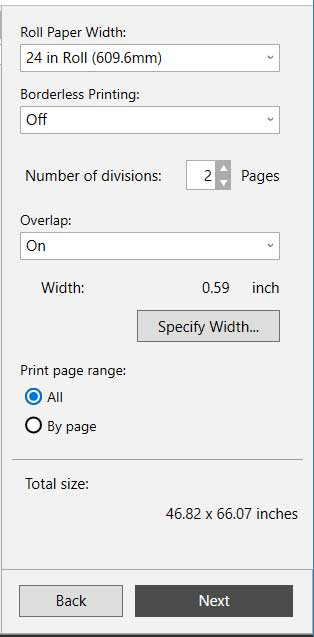
- Roll Paper Width
-
Set the width of the roll paper.
- Borderless Printing
-
Set whether to use borderless printing.
Setting this to On expands the print area to both edges and to the leading edge of the paper. Note
Note- By setting Borderless Printing to On, the overlap is made only on the right side of each page, and the page on the very right side is printed on the full width of the roll paper.
By selecting On in Borderless Printing, the image is printed so a white margin does not appear on all four edges of the paper after the printouts are pasted together.
- Number of divisions
-
Set the number of divisions for the objects.
- Overlap
-
Set the overlap for pasting together the images that were divided and printed.
- On
-
Prints using a margin with the width specified in Specify Width.
- Off
-
Prints using no margin for the overlap.
- Width
-
Shows the width of the overlap that is set.
- Specify Width
-
Click to show the dialog for specifying the width.
Set the width of the overlap for pasting together the images that were divided and printed.
Note- If you set a wide Overlap, the printed area will be that much smaller, so the size of the printed image after it is pasted together will be smaller.
- A value smaller than 15.00 mm/0.59 inches cannot be set.
- Print page range
Select the pages to use for printing.
- All
All divided pages are intended for printing.
- By page
Divided pages that were clicked on the preview screen are intended for printing.
- Total size
-
Shows an approximation of the size after pasting together the images that were divided and printed.
Print Settings Screen
Click Next in the edit screen, and then make the print settings.
After setting the required items, click Print to start printing.
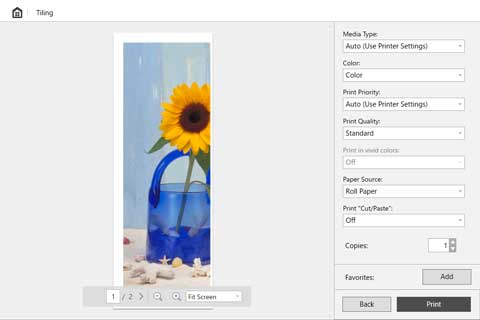
- Preview Area
-
Shows a preview of the print results for each page.

- Print Settings Area
-
Make the settings related to printing, such as the type of paper.
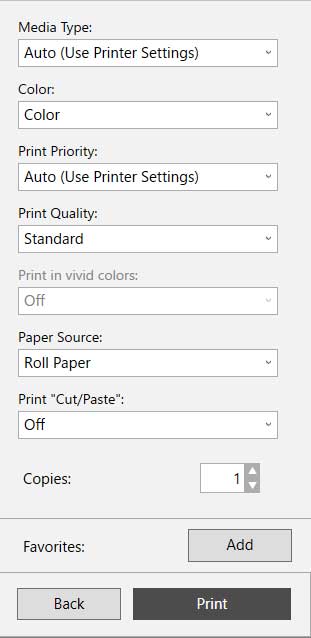
- Media Type
- Set the type of paper to print on.
- Color
- Set either Color or Monochrome for the color to print.
- Print Priority
- Set the elements to specifically emphasize in the print results.
- Print Quality
- Select the print quality that suits your objectives.
- Print in vivid colors
- Set whether to print in vivid colors.
- Paper Source
- Set how the paper is fed.
- Print "Cut/Paste"
- Set whether to print text and guidelines in the cut area and the overlap area.
- Copies
- Set the number of copies to print.
- Favorites
- You can register the settings that are currently set in the edit screen and the print settings screen to Favorites by clicking Add. You can easily call up the settings that are registered in Favorites from the Favorites sheet on the home screen.
Status Bar
Displays information, such as the number of data that are selected and the paper size.

![]() Note
Note
- You can use the View menu to show or hide the tool and status bar.
