
Starting from an Application Supporting Plug-in
To print data of Microsoft Office application software supporting the plug-in by using Free Layout plus, use the following procedure to start Free Layout plus and input data.
![]() Note
Note
- The following explanation uses the screens that are displayed when you use Microsoft Word.
-
Start Microsoft Word.
-
Confirm that the Canon Free Layout plus ribbon is displayed.

 Important
-
If the Canon Free Layout plus ribbon is not displayed, refer to "Canon Free Layout plus Ribbon Is Not Displayed".
-
-
Click Edit/Print.
Free Layout plus starts.
The data you edited in the Office application appears in the Input Data List on the home screen. (See "Free Layout plus Home Screen.")
Canon Free Layout plus Ribbon Is Not Displayed
The Canon Free Layout plus ribbon may not appear in Word, PowerPoint or Excel Office applications, and the Free Layout plus functions may not be available.
In this event, re-install Free Layout plus.
You can also enable add-ins to display Canon Free Layout plus.
See below for the procedure for re-installing the plug-in or enabling add-ins.
Re-installing Free Layout plus
If a problem occurs, such as the system or an application terminating abnormally, the Office application disables add-ins as a safety precaution.
In this event, you will need to re-install Canon Free Layout plus to display the Free Layout plus ribbon.
![]() Note
Note
-
You cannot re-install Free Layout plus once an Office application is running. When the message appears, select Cancel and close the active Office application.
Re-install Free Layout plus as follows:
-
Close Office application if it is open.
-
Install Free Layout plus.
Enable Free Layout plus from the Options in the Office Application
If a problem occurs, such as the system or an application terminating abnormally, the Office application disables add-ins as a safety precaution.
In this event, you will need to restore the disabled add-ins in order to display the Canon Free Layout plus ribbon.
Use the procedure below to restore the add-ins disabled by Office application.
-
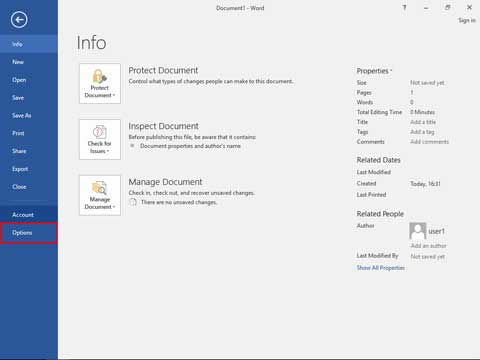
Select Options from the File menu.
Select Options from the File menu on the Office application.
-
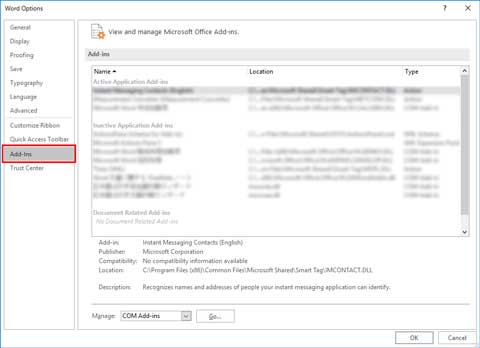
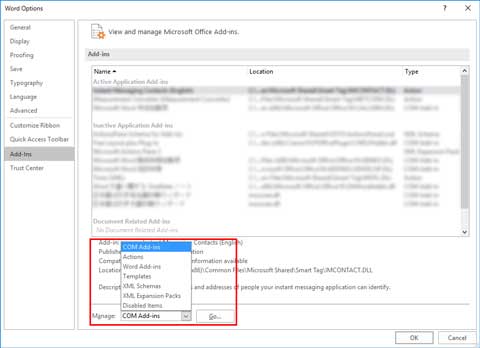
From the list on the left side of the <application name> options dialog box, select Add-ins.
-
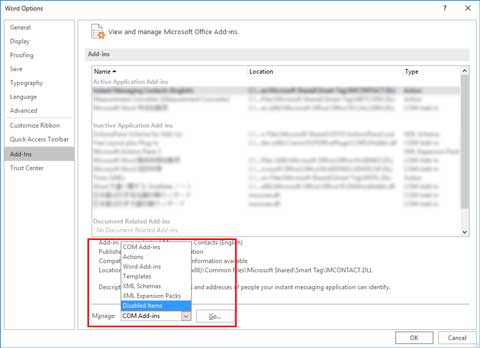
From the Manage combo box, confirm the settings in Disabled Items and COM Add-ins.
- How to confirm Disabled Items
- From the Manage combo box, select Disabled Items
- Click Go button.
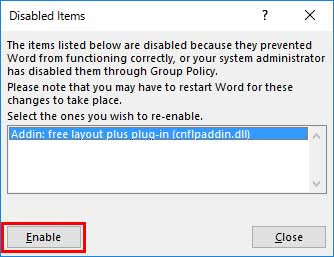
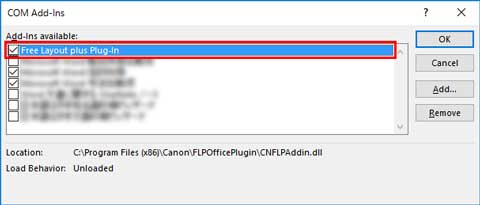
- If Addin :free layout plus plug-in (cnflpaddin.dll) is displayed in the Disabled Items dialog box, select it and click the Enable button.
- How to confirm COM Add-ins
- From the Manage combo box, select COM Add-ins
- Click Go button.
- If the Free Layout plus Plug-In check box is not selected in the COM Add-ins dialog, click it to select it.
- How to confirm Disabled Items
-
Close all the dialog boxes and restart the Office application.
