1314
Cause
Paper is jammed inside the rear cover when performing automatic duplex printing.
Action
If the paper is jammed inside the rear cover when performing automatic duplex printing, remove the paper following the procedure below.
 Note
Note
-
If you need to turn off the printer to remove jammed paper during printing, press the Stop button to cancel print jobs before turning off the printer.
-
Rotate the printer so that the rear side of the printer faces toward you.

-
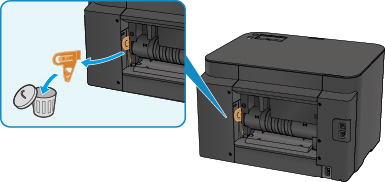
If the protective material for the rear cover remains attached, remove it.

-
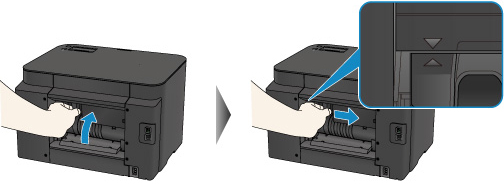
Open the rear cover.
Slide the rear cover to the left then open it.

-
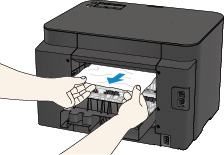
Pull out the paper slowly.

 Note
Note-
Do not touch the inner parts of the printer.
-
If you cannot pull the paper out, try the following.
-
Turn the printer off and turn it back on.
The paper may be ejected automatically.
-
Pull out the paper output tray.
It becomes easy to pull out the paper.
-
-
-
Close the rear cover slowly.
Close the rear cover then slide it to the right.
Slide the rear cover so that the
 mark on the rear cover aligns with the
  mark on the printer.
-
Reload the paper, then press the printer's OK button.
If you turned off the printer, all print jobs in the queue are canceled. Reprint if necessary.
 Note
Note-
When reloading the paper, confirm that you are using the paper suited for printing and are loading it correctly.
Align the paper guides with the both edges of the paper when you load paper.
-
If you cannot remove the paper or the paper tears inside the printer, or if the paper jam error continues after removing the paper, contact the service center.


