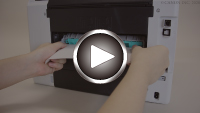
Removing Jammed Paper from Rear Side
Here, the explanation uses the example of a 2-cassette printer in the illustrations.
 Note
Note
- If paper becomes jammed during printing and you need to turn off the printer to remove it, press the printer's Stop button to stop the printing before you turn off the printer.
-
Make sure you have unplugged the power cord.
-
Rotate printer so that rear side of printer faces toward you.

 Important
- When changing the orientation of the printer, do not turn the printer upside down or tilt it. The ink may leak out.
-
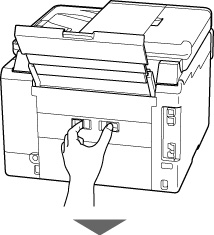
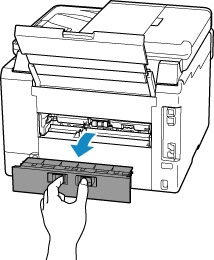
Detach rear cover.
Pull out the rear cover.
-
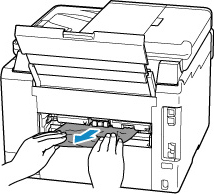
Slowly pull out paper.
 Note
Note- Do not touch the inner parts of the printer.
If you were not able to remove the paper in this step, detach the transport unit cover and remove the paper by following these steps.
-
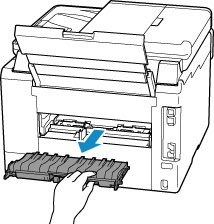
Detach transport unit cover.
Lift up the transport unit cover and pull out it.

-
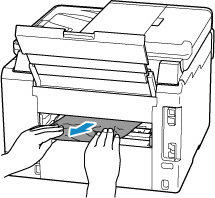
Slowly pull out paper.
 Note
Note- Do not touch the inner parts of the printer.
Make sure all jammed paper is removed.
-
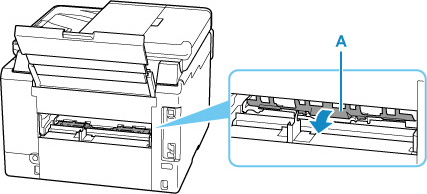
If parts (A) are raised, lower them toward you.
-
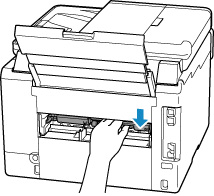
Attach transport unit cover.
Insert the transport unit cover slowly all the way into printer and take down the transport unit cover.

-
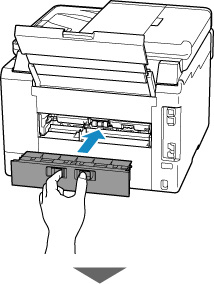
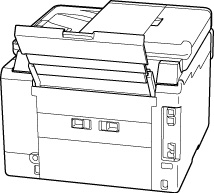
Attach rear cover.
Push in the rear cover until it is closed completely.
-
Plug in the printer again and turn it back on.
All jobs in the print queue are canceled. Redo the printing.
 Note
Note- When reloading the paper, make sure you are using suitable paper and loading it correctly.
- Before printing, pull out the paper output tray.
If the measures above do not solve the problem, contact your nearest Canon service center to request a repair.
 Important
- Do not tilt the printer when moving it since the ink may leak out.
- When transporting the printer for repairing it, see Repairing Your Printer.

