 |
Printing Portions of Web Pages Using the Auto Clipping Function
You can create clips easily using the auto clipping function which automatically selects portions of the web page displayed in Internet Explorer. You can edit and print the created clips.
 Reference
 Depending on the web page, the portion to clip may not be selected as expected. In that case, adjust the selected area manually.
1 Open the web page you want to print in Internet Explorer.
2 Click the  Auto Clip button.

The screen switches to the Auto Clip Mode screen.
3 In the Auto Clip Mode screen, check the selected area.
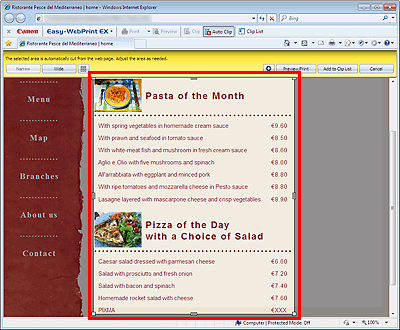
Adjust the selected area manually as required.
![]() Auto Clip Mode Screen
Auto Clip Mode Screen
4 Click the Add to Clip List button in the Auto Clip Handling area.
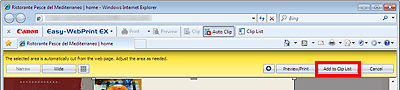
The Clip List sidebar is displayed and the portion selected in the Preview area is added to the Clip List.
Reference
You can create up to 99 clips, including images that can be inserted in the Edit and Print Clips screen.
5 In the Clip List sidebar, select the checkboxes of the clips you want to print, then click the Edit and Print Clips button.
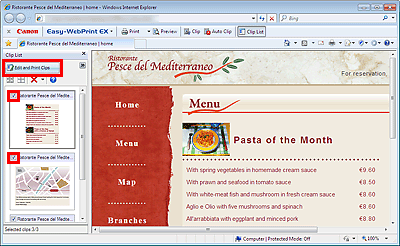
The Edit and Print Clips screen appears.
Reference
See "Clip List Sidebar" for details on the Clip List sidebar.
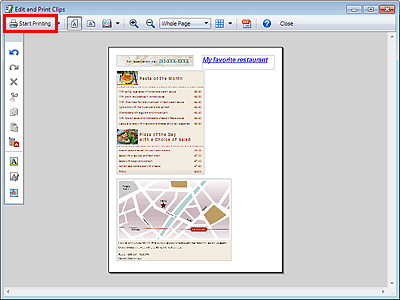
6 Edit as required.
You can arrange the clip positions and add text to a page with clips in the Edit and Print Clips screen.
![]() Edit and Print Clips Screen
Edit and Print Clips Screen
7 Click the  Start Printing button.
The created clips are printed.
Reference
Make advanced print settings.
![]() Print/Print Settings Dialog Box
Print/Print Settings Dialog Box
Set the paper size, margins, etc.
![]() Page Setup Dialog Box
Page Setup Dialog Box
Select optional items to print (header, footer, etc.).
![]() Option Settings Dialog Box
Option Settings Dialog Box
Specify options for creating clips.
![]() Clip Details Dialog Box
Clip Details Dialog Box
Specify options for text/image truncation between pages when printing clips.
![]() Option Settings Dialog Box (Clips)
Option Settings Dialog Box (Clips)
Print a web page easily.
![]() Printing a Web Page Easily
Printing a Web Page Easily
Preview and print the web page.
![]() Previewing and Printing
Previewing and Printing
Print portions of web pages using the clipping function.
![]() Printing Portions of Web Pages Using the Clipping Function
Printing Portions of Web Pages Using the Clipping Function
