Printing Photos
Print your favorite photos easily.

-
Check that printer is on.
-
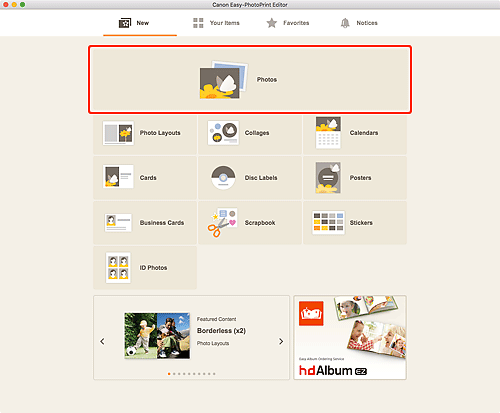
In New screen, click Photos.

The view switches to the Photo Locations screen.
-
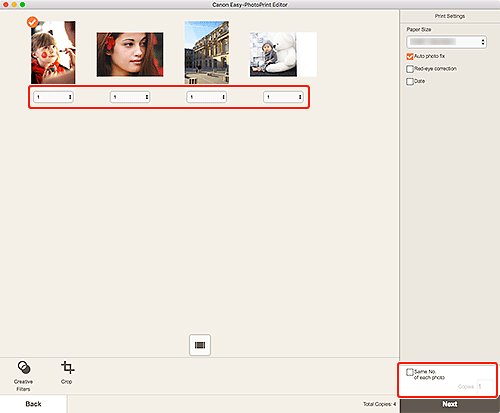
Select the photo(s) you want to print.
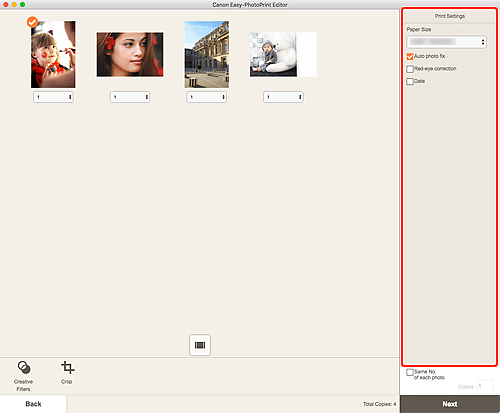
The view switches to the Print Settings screen.
-
Set number of copies to print for each photo or all photos.

-
Set Auto photo fix, Red-eye correction, and other settings.

 Note
Note- For details on the setting items, see Print Settings Screen.
-
Photos can be cropped or enhanced before printing as needed.
-
Load paper in printer.
-
Click Next.
The Print dialog appears.
-
Specify printer and paper to use, and other settings.
 Note
Note- For details on the Print dialog, see Help of macOS.
-
Click Print.
 Important
- If you print a large number of high resolution images at one time, it may take time to start printing, or printing may pause halfway through.
- If you print in a bordered layout, the margins on the left and right or the top and bottom may become wider than the other.
 Note
Note
- Colors may fade with time if the printed paper is left for a long period of time.
After printing, dry the paper sufficiently, and then store or display indoors at room temperature and normal humidity, avoiding high temperatures, high humidity, and direct sunlight.
To avoid direct exposure to air, we recommend that you store the paper in an album, plastic folder, photo frame, or other container.

