
Tiling/Poster
A single page of images can be divided and printed on multiple sheets of paper.
-
Select Tiling/Poster
The layout selection screen will be displayed.
- Adjacent
- The paper is printed in an overlaid format with no gaps between them.
- Separated
- Separate the paper when printing. Images in the gap area will not be printed.
-
Click Next
The editing screen will be displayed.
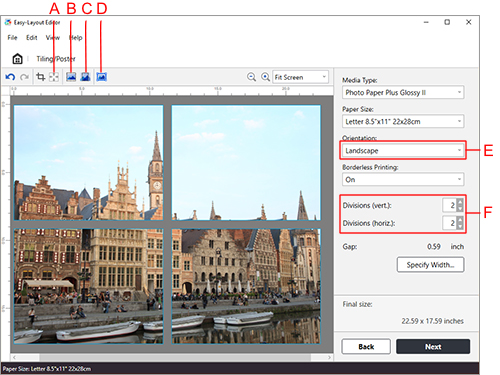
- A: Erase Margin
- Crop the data by deleting the margins set in the application software you are using.
- B: Fit
- The image will be contained within the paper. Margins may appear depending on the paper size in order to maintain the aspect ratio of the image.
- C: Fit (No margins)
- Arrange the images on the paper without leaving any space. The image may be cut off depending on the paper size in order to maintain the aspect ratio of the image.
- D: Select Image
- Select an image arranged within the paper.
- E: Orientation
- Selects the printing orientation.
- F: Divisions (vert.) / Divisions (horiz.)
- Sets the number of divisions you want for the image.
-
Check if the image is cut off
Click Select Image (D), and check the area where the image is cut off (the transparent area).
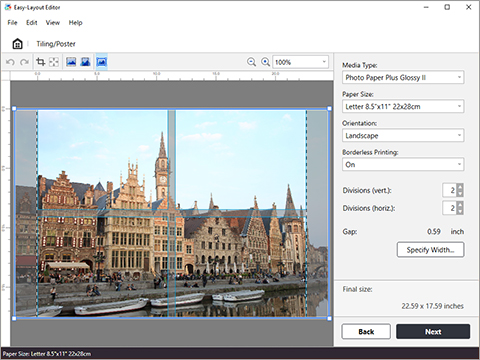
If you want to change the area range of the image, use Orientation (E) or Divisions (vert.) / Divisions (horiz.) (F) to change the print orientation or the number of divisions, or drag the arranged images.
-
Click Next
Configure print-related settings.
-
Click Print
Printing starts.
