
Adding Cloud Storage That Supports WebDAV
You can add cloud storage that supports WebDAV using the following procedure.
-
Click Cloud service integration button on main screen.
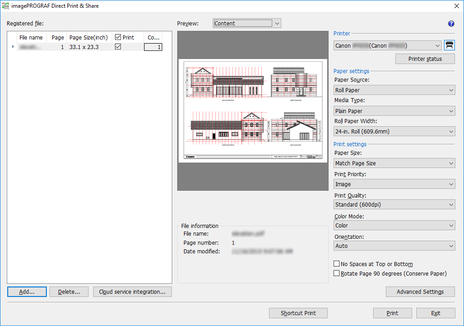
The Cloud service integration dialog box is displayed.
-
Click the
 button in the Cloud service integration dialog box.
The Preferences dialog box is displayed.
-
Click the Cloud storage settings button.
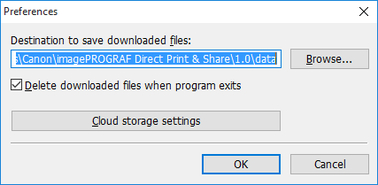
The Cloud storage settings dialog box is displayed.
-
Click the Add button.
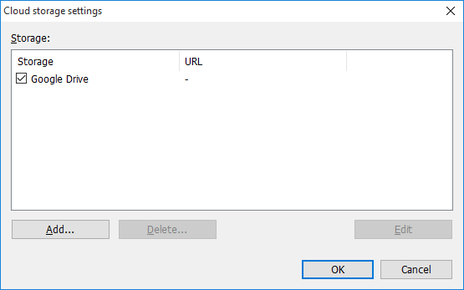
The Cloud storage information dialog box is displayed.
-
Enter the cloud storage name in Storage name and the URL for connecting to WebDAV in URL, and then click the OK button.
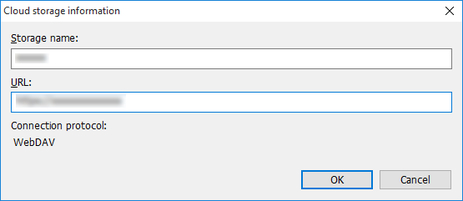
The added cloud storage can now be selected in the Cloud storage selection dialog box.
