Setting with Adobe Photoshop CC (Windows)
Follow these steps to set an ICC profile when printing via Adobe Photoshop CC.
Windows 10
-
In Photoshop, open the image for which you want to set a profile.
-
From the File menu, select Print....
The print settings dialog box appears.
-
From Color Handling, select Photoshop Manages Colors.
-
From Printer Profile, select the installed ICC profile.
-
Select a method for Rendering Intent.
 Note
Note- Select Perceptual to print with an impression close to that on the monitor by correctly reflecting the characteristics of the data displayed on the monitor. For details, refer to the "Digital Photo Printing Guide" of the Online Manual.
Next, set up the printer driver.
-
Make sure that your printer is selected, then click Print Settings....
The Properties dialog box appears.
-
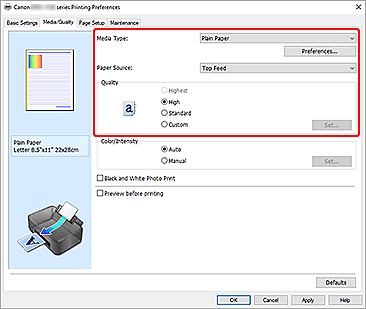
Click the Media/Quality tab, then set Media Type, Paper Source and Quality.
Select the Media Type and Paper Source that match the paper to print on.

-
In Color/Intensity, select Manual, and then click Set....
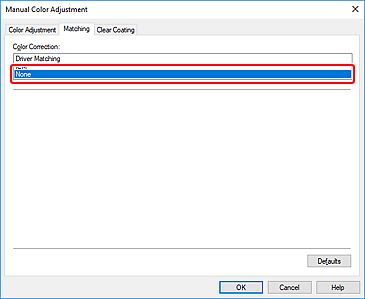
The Manual Color Adjustment dialog box appears.
-
Click the Matching tab, and then select None for Color Correction.

-
Click OK.
-
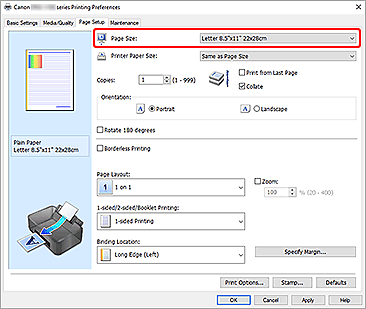
In the Properties dialog box, click the Page Setup tab, and then select Page Size.

 Note
Note- Select "XXX (Margin 25)" as needed. XXX stands for the paper size.
-
Click OK.
-
In the print settings dialog box, click Print.
Printing starts.
